
How to make French bread at home step by step using simple ingredients and basic kitchen tools.
How to Make French Bread at Home: A Simple, Step-by-Step Guide for Beginners
There’s something almost magical about the moment you pull a golden loaf of French bread from your own oven. The crust crackles as it cools, filling your kitchen with that unmistakable aroma, warm, yeasty, and utterly irresistible. I still remember the first time I made French bread at home. I’d always assumed it was reserved for professional bakers with fancy equipment and years of training. But here’s the truth: you can absolutely make bakery-quality French bread in your own kitchen, and you don’t need anything more than four simple ingredients and your own two hands.
If you’ve ever wondered how to make French bread but felt intimidated by the process, I’m here to tell you that it’s so much easier than you think. Yes, it takes a little time, mostly hands-off waiting while the dough does its thing, but the actual work? It’s straightforward, forgiving, and honestly kind of therapeutic. By the end of this guide, you’ll have all the confidence you need to bake beautiful, crusty loaves that’ll make your friends and family think you’ve been holding out on them.
Why You’ll Love Making French Bread at Home
Let me give you a few really good reasons to start baking your own French bread today.
First, there’s the cost. A decent baguette from a bakery can easily run you $4-6, and that’s if you live near a good bakery. When you make French bread at home, you’re spending maybe 50 cents on ingredients. Flour, water, yeast, and salt, that’s literally it. No preservatives, no mystery ingredients, just pure, simple bread.
Then there’s the freshness factor. Store-bought bread, even from a bakery, starts losing its magic the moment it comes out of the oven. When you bake at home, you control exactly when that bread is ready. Want fresh bread for Sunday dinner? You’ve got it. Craving warm baguette for breakfast? Done.
But honestly? The best part is the satisfaction. There’s something deeply fulfilling about creating food from scratch, especially something as fundamental and beloved as bread. The first time you slice into a loaf you’ve made yourself and hear that perfect crackle of the crust, you’ll understand what I mean.
And here’s the kicker: this recipe doesn’t require any special equipment. No stand mixer, no bread machine, no baguette pan (though you can use one if you have it). Just a bowl, your hands, and a regular baking sheet. If you can stir and knead, you can make French bread.
What Makes French Bread Special?
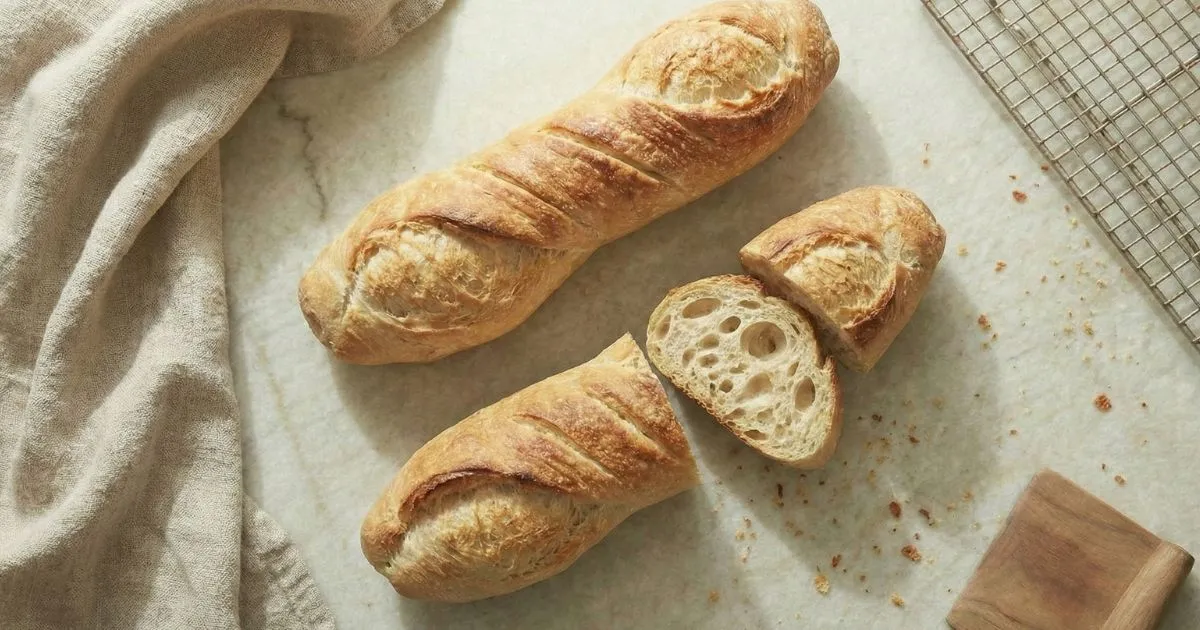
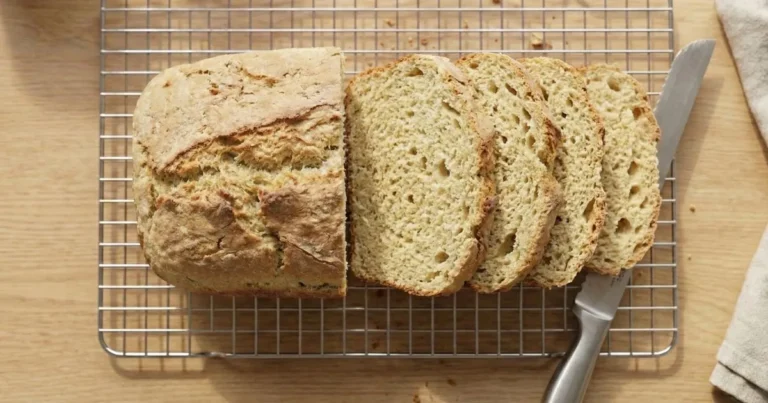
Before we dive into the how-to, let’s talk about what we’re actually making here. French bread is beloved worldwide for a few key characteristics: that gorgeously crispy, golden-brown crust that shatters when you bite into it, an airy interior with irregular holes (what bakers call an “open crumb”), and a slightly chewy texture that’s perfect for everything from sandwiches to sopping up sauce.
French bread stands out from other breads because of its straightforward, no-frills approach. While Italian breads might include olive oil and herbs, and other breads add milk, butter, eggs, or sugar, traditional French bread sticks to the basics. This lean dough (that’s baker-speak for dough without fat or sugar) develops its flavor through fermentation and technique alone.
You’ve probably heard of baguettes, those long, skinny loaves that are quintessentially French. A baguette is actually a type of French bread, specifically shaped long and thin. But French bread can also be shaped into wider loaves called batards, or even round boules. For this recipe, we’re making a classic shape that’s somewhere between a baguette and a batard, easier to handle for beginners, but still beautifully authentic.
The secret to that incredible crust? Steam. French bakeries use special steam-injected ovens, but don’t worry, I’ll show you how to create steam in your regular home oven with nothing more complicated than a pan of water or a spray bottle.
Essential Ingredients for Homemade French Bread
One of the beautiful things about learning how to make French bread is realizing how few ingredients you actually need. Let me walk you through each one:
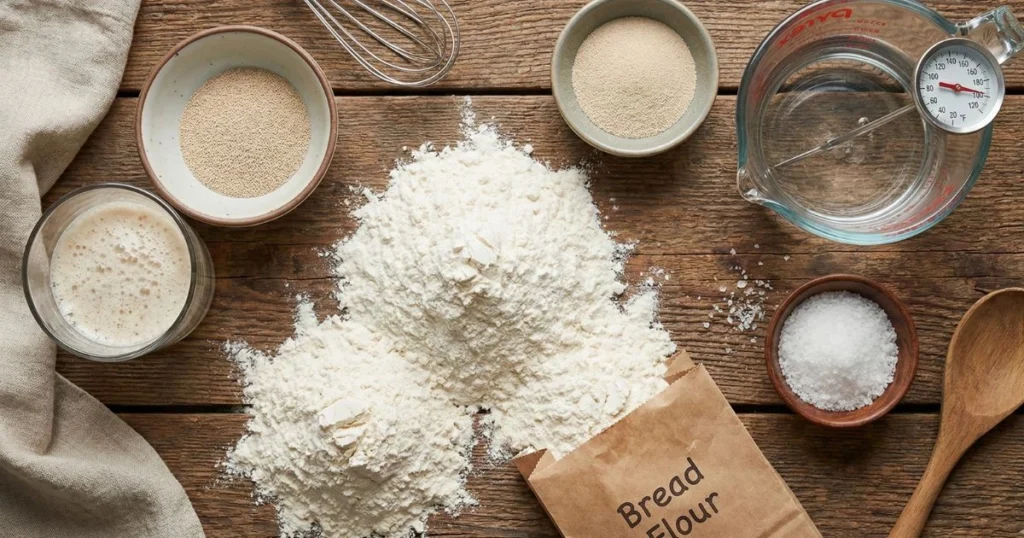
Bread Flour (or All-Purpose Flour)
Bread flour is my first choice here because it has a higher protein content (usually around 12-14%) compared to all-purpose flour (10-12%). That extra protein means more gluten development, which gives you that beautiful chewy texture and helps create those airy holes in the crumb. King Arthur Baking has an excellent guide on different flour types and their uses if you want to dive deeper.
That said, if all you have is all-purpose flour, use it! Your bread will still be delicious, maybe just slightly less chewy. I’ve made this recipe with both, and honestly, both versions disappeared from my kitchen in record time.
Active Dry Yeast or Instant Yeast
Yeast is what makes your bread rise, creating all those wonderful air pockets. Active dry yeast needs to be dissolved in warm water first (we call this “proofing” or “blooming”), while instant yeast can be mixed directly into your flour. I’ll give you instructions for both.
Make sure your yeast is fresh! Check the expiration date on the packet. Old yeast won’t rise properly, and you’ll end up with dense, flat bread. If you’re not sure if your yeast is still good, proof it even if you’re using instant,you’ll see it get foamy and bubbly within 10 minutes if it’s alive and well. The Kitchn has a fantastic tutorial on how to properly proof yeast.
Salt
Don’t skip the salt! It’s not just about flavor (though it definitely makes your bread taste better). Salt actually strengthens the gluten structure and helps control the fermentation rate. I prefer fine sea salt, but regular table salt works perfectly fine too.
Water
Lukewarm water is key, you want it around 100-110°F. If you don’t have a thermometer, test it on the inside of your wrist. It should feel warm but comfortable, like a nice bath. Too hot, and you’ll kill your yeast. Too cold, and the yeast will be sluggish and take forever to rise.
That’s it. Four ingredients. Chances are, you already have most of these items in your kitchen.
Kitchen Tools You’ll Need (Nothing Fancy!)
I promised you wouldn’t need special equipment, and I meant it. Here’s what you’ll use:
- Large mixing bowl
- Measuring cups and spoons (or better yet, a kitchen scale if you have one)
- Clean kitchen towel or plastic wrap
- Baking sheet (or a baguette pan if you happen to have one)
- A very sharp knife, razor blade, or bread lame to score the dough before baking
- Spray bottle for misting water, or a pan for creating steam
- Wire cooling rack
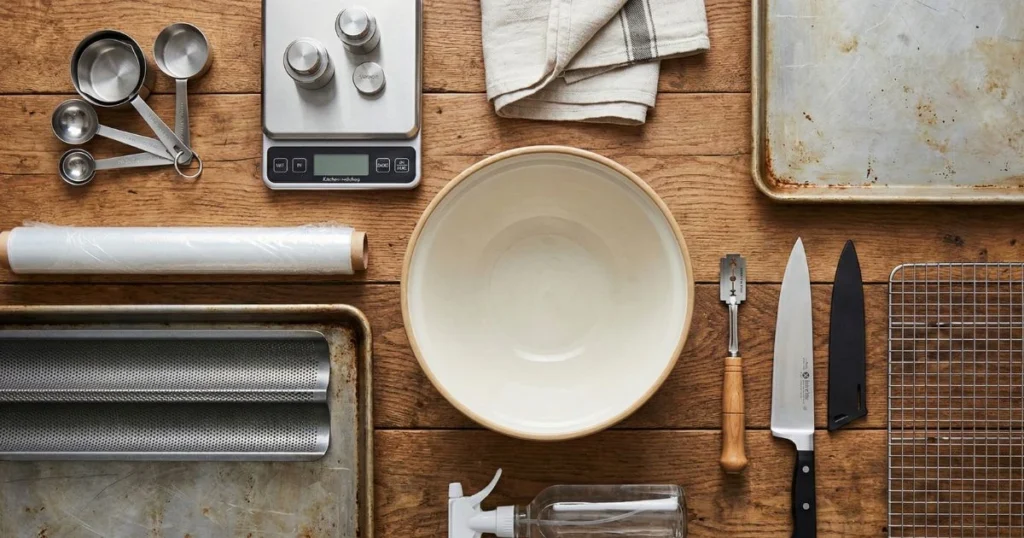
See? Nothing you wouldn’t find in a typical kitchen. No stand mixer, no bread machine, no fancy French banneton baskets. Just the basics.
How to Make French Bread: Step-by-Step Instructions
Alright, let’s get to the good stuff. I’m going to walk you through this entire process like I’m right there in the kitchen with you. Take a deep breath—you’ve got this.
Step 1: Activate Your Yeast (If Using Active Dry)
If you’re using instant yeast, you can skip this step and add it directly to your flour in step 2. But if you’ve got active dry yeast, here’s what to do:
Pour 1½ cups of warm water (remember, 100-110°F) into a small bowl or measuring cup. Sprinkle 2¼ teaspoons of active dry yeast, equal to one standard packet, over the water.
You can add a tiny pinch of sugar if you want, it gives the yeast something to eat and can speed up the process, but it’s not necessary for French bread.
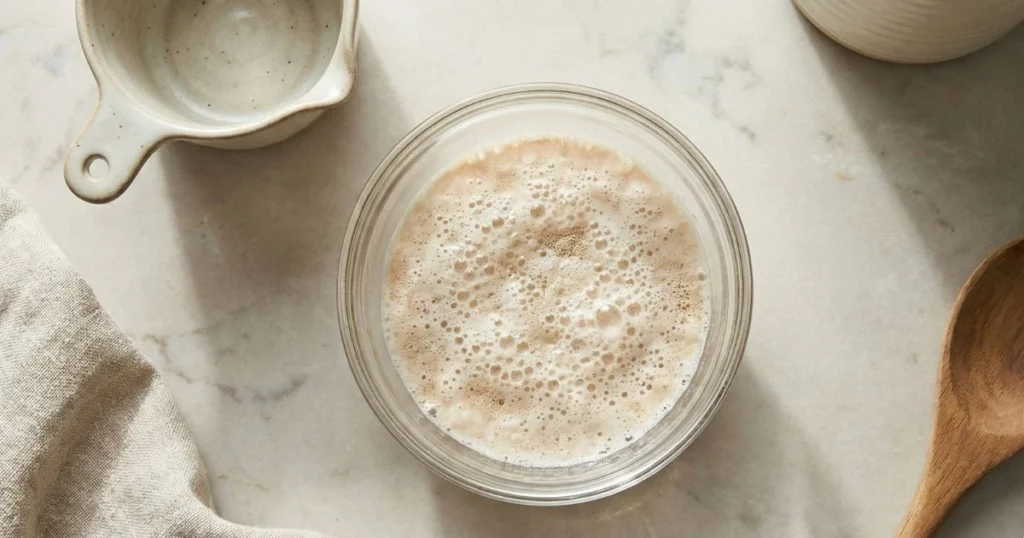
Give it a gentle stir and then walk away for 5-10 minutes. When you return, the surface should look foamy and bubbly, as if a little yeast celebration has sprung to life in your bowl. That’s exactly what you want to see. If nothing happens and the mixture looks the same, your yeast might be dead, time to start over with fresh yeast.
Step 2: Mix Your Dough
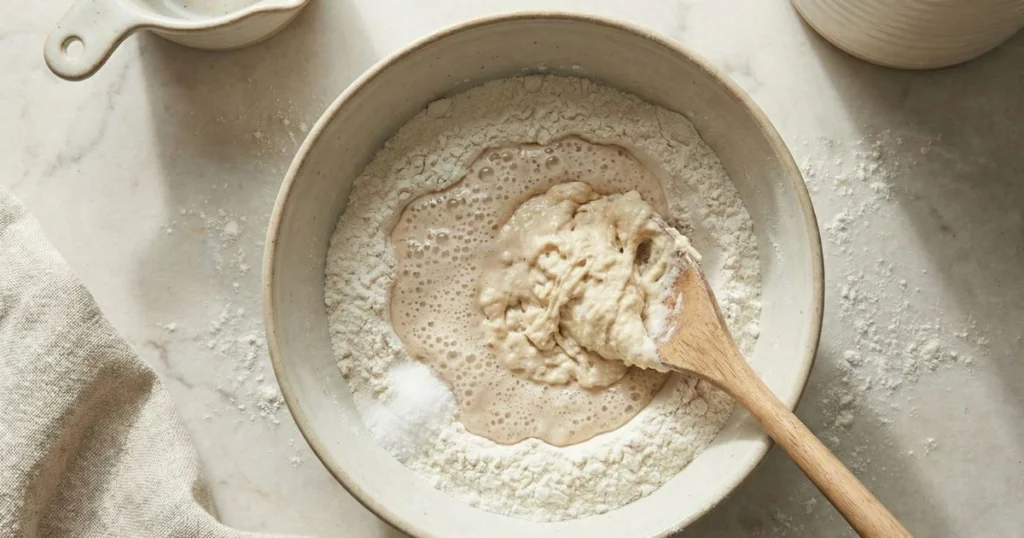
In your large mixing bowl, whisk together 4 cups of bread flour and 2 teaspoons of salt. Make a little well in the center and pour in your yeast mixture (or your warm water plus instant yeast).
Using a wooden spoon or your hand, stir everything together until you’ve got a shaggy, sticky mass that looks more like a mess than dough. Don’t worry, this is exactly what it should look like at this stage. There will be dry bits of flour and wet patches, and the whole thing will seem pretty rough. That’s perfect.
Step 3: Knead the Dough
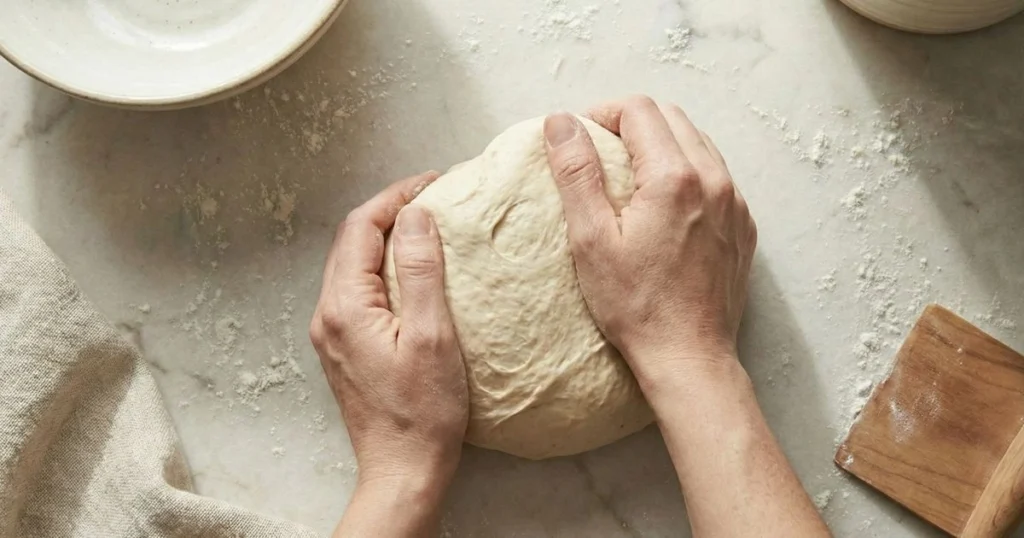
Here’s where the magic starts to happen. Lightly flour your countertop or a large cutting board and turn your shaggy dough out onto it. Now you’re going to knead.
If you’ve never kneaded bread before, here’s the basic motion: push the dough away from you with the heels of your hands, fold it back over itself, give it a quarter turn, and repeat. Push, fold, turn. Push, fold, turn. It’s rhythmic and actually pretty meditative once you get into the groove. Serious Eats has an excellent video tutorial on kneading techniques if you’re a visual learner.
Knead for about 8-10 minutes. Your arms might get tired, think of it as a free workout! As you work, you’ll notice the dough transforming from that rough, sticky mess into something smooth, elastic, and beautiful. If the dough is sticking to your hands or the counter, sprinkle on a tiny bit more flour, but don’t go overboard. A slightly tacky dough is better than a dry one.
How do you know when you’re done kneading? Try the windowpane test: pinch off a small piece of dough and gently stretch it between your fingers. If you can stretch it thin enough to see light through it without it tearing, your gluten is well-developed and you’re ready for the next step. If it tears immediately, keep kneading for a few more minutes.
Step 4: First Rise (Bulk Fermentation)
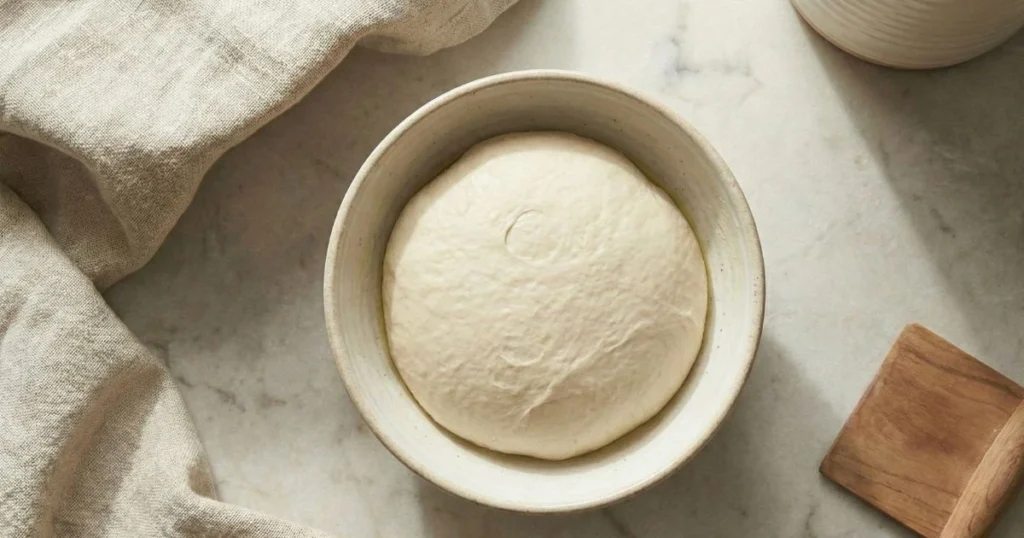
Lightly oil a clean bowl, just a teaspoon of oil rubbed around the inside is plenty. Place your beautiful ball of dough inside and turn it once so the top is lightly coated with oil (this prevents a dry skin from forming). Cover the bowl using a damp kitchen towel or a layer of plastic wrap.
Now, find a warm spot in your kitchen and let the dough rise for 1-2 hours, until it has doubled in size. “Doubled” means exactly what it sounds like, if your dough ball was the size of a grapefruit, it should now be the size of a small cantaloupe.
Where’s the best spot for rising? I like to put mine on top of the refrigerator (heat rises, so it’s usually warmest up there), near a sunny window, or in my oven with just the light on (but not the heat!). If your kitchen is cold, it might take the full 2 hours or even a bit longer. That’s fine, good bread can’t be rushed.
Here’s a neat trick to test if your dough is ready: gently poke it with your finger. If the indentation slowly springs back about halfway, it’s perfect. If it springs back immediately, it needs more time. If it doesn’t spring back at all, you might have let it go a bit too long (but it’ll still make great bread).
Step 5: Shape Your French Bread
Once your dough has doubled, it’s time to shape it. Punch it down gently, literally give it a gentle punch to release the air. You’ll hear a satisfying whoosh as the gas escapes. Transfer the dough onto a lightly floured work surface.
If you want to make two smaller loaves (which I recommend for beginners), divide the dough in half with a sharp knife. For each portion, here’s how to shape it:
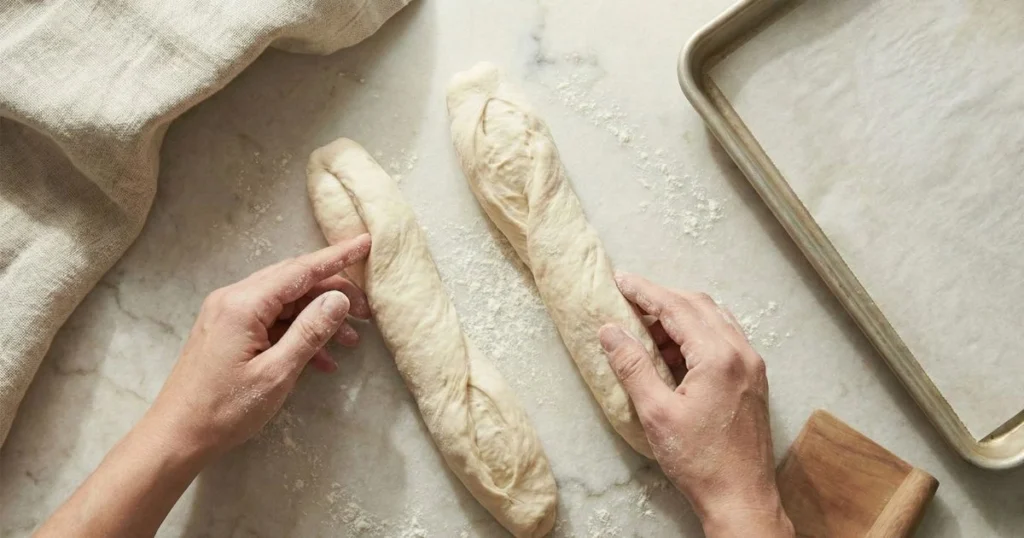
Lightly press the dough into a rectangle roughly 8 inches wide. Fold the long edge nearest to you up to the middle, and press it down with your fingertips to seal. Now fold the far edge down to meet the first fold, and seal it again. You’re creating layers and building structure.
Finally, fold the dough in half lengthwise so the seam is on the bottom, and use your palms to gently roll it into a log shape, about 12-14 inches long. Apply gentle pressure as you roll, working from the center out to the edges. This creates surface tension, which helps your bread rise up instead of spreading out.
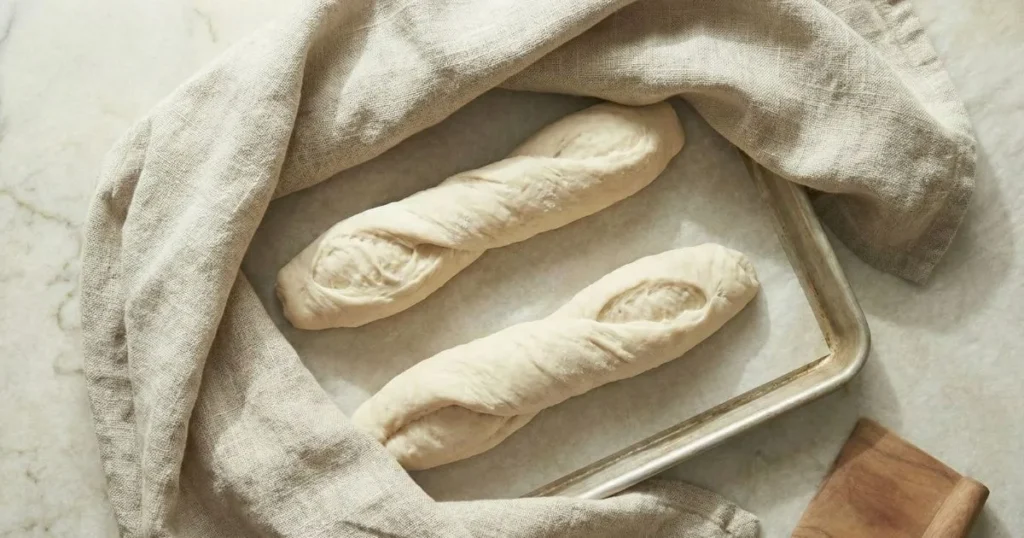
Place your shaped loaves on a parchment-lined baking sheet, seam-side down, leaving a few inches between them. Your loaves don’t need to be perfect, rustic and homemade is beautiful! Honestly, some of the best French bread I’ve made looked a little wonky.
Step 6: Second Rise (Proofing)
Cover your shaped loaves loosely with a kitchen towel and let them rise for another 30-45 minutes. They won’t double this time, you’re just looking for them to become puffy and noticeably larger, maybe increased by about 50%.
While the dough is proofing, preheat your oven to 450°F (230°C). If you have a baking stone, put it in to heat up too. Also, place a shallow metal pan on the bottom rack of your oven, this is what we’ll use to create steam.
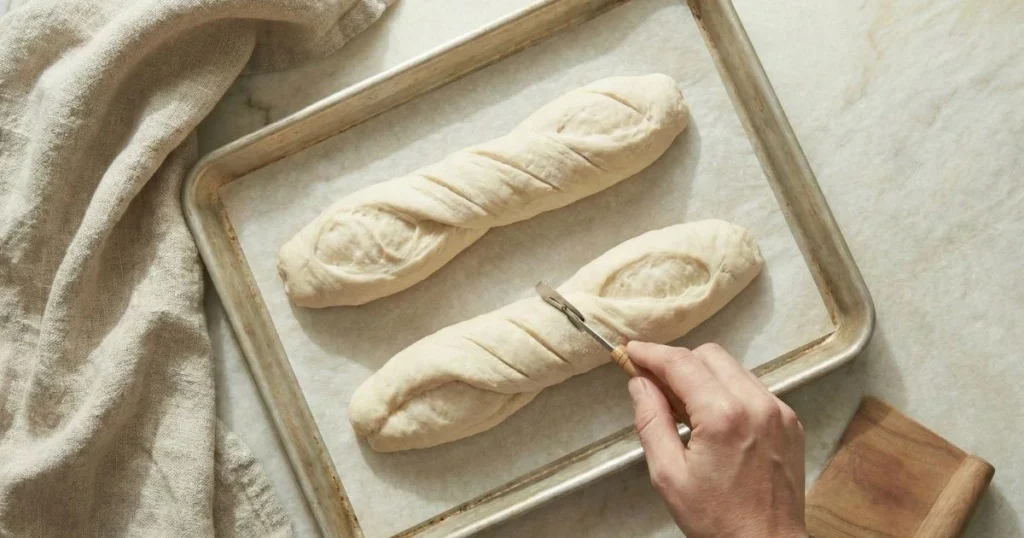
Step 7: Score the Dough
Right before baking, you need to score your loaves. This isn’t just for looks (though it does make them beautiful), it’s functional. As the bread bakes, it expands rapidly in the oven (bakers call this “oven spring”). If you don’t give it a place to expand, it’ll burst in random places. Scoring controls exactly where the bread opens up.
Using a very sharp knife, razor blade, or bread lame, make 3-4 diagonal slashes across the top of each loaf. Each cut should be about ¼ inch deep, and your blade should be at a slight angle rather than straight up and down. Move quickly and confidently, hesitant cuts tend to drag and stick.
Don’t be scared of this step! I know it feels intimidating to take a blade to your carefully shaped dough, but I promise it’s easier than it looks. Even if your slashes aren’t perfect, your bread will still taste amazing.
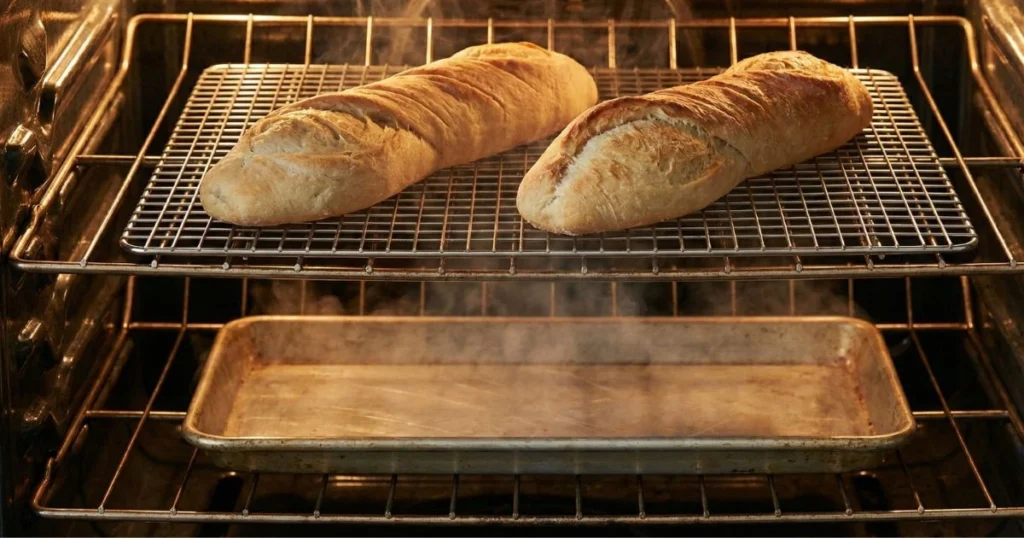
Step 8: Create Steam and Bake
This is it, the moment of truth! Slide your scored loaves into the preheated oven. Immediately pour about a cup of hot water into that metal pan on the bottom rack (be careful, it’ll create a big puff of steam). Alternatively, if you don’t want to deal with a pan of water, you can mist your loaves generously with water from a spray bottle and mist the oven walls a few times too.
Quickly close the oven door to trap all that steam inside. This steam keeps the surface of your bread moist during the first part of baking, which allows it to expand to its fullest before the crust sets and hardens.
Bake for 20-25 minutes, until your loaves are deeply golden brown and look absolutely gorgeous. If you have an instant-read thermometer, the internal temperature should be between 190-200°F.
Here’s a classic test: carefully remove one loaf from the oven (use mitts!) and tap the bottom. It should have a hollow sound, similar to tapping on a door.
That hollow sound tells you the interior is fully baked and not doughy.
Step 9: Cool and Enjoy
I know this is the hardest step, but try to resist cutting into your bread right away. Transfer your loaves to a wire rack and let them cool for at least 15-20 minutes before slicing.
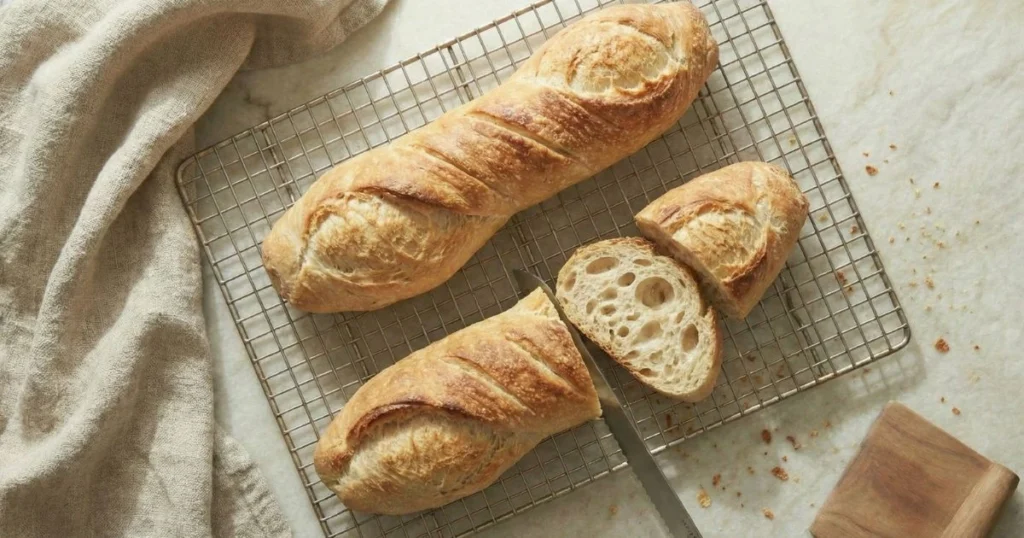
Why? The bread is actually still cooking inside from residual heat, and the structure is setting. If you cut it too soon, the interior can be gummy and the slices will compress. I know it’s tough to wait when your kitchen smells like heaven and that crust is calling your name, but trust me on this one.
Once it’s cooled enough, grab your sharpest serrated knife and slice in. Listen for that perfect crackle of the crust. Look at that beautiful, airy crumb with all those irregular holes. Take a bite. Congratulations, you just made French bread!
Pro Tips for Perfect French Bread Every Time
Now that you know the basic process of how to make French bread, let me share some tips I’ve learned along the way that’ll help you level up your bread game:
Use a kitchen scale if you have one. Measuring flour by weight (grams) is way more accurate than measuring by volume (cups), because how tightly you pack the cup can really vary. If you’re serious about bread baking, a $15 kitchen scale is the best investment you’ll make.
Room temperature matters more than you think. In a cold kitchen, your rises will take longer. In a hot kitchen, they’ll go faster. Learn to watch your dough, not just the clock.
Don’t skip the steam. I can’t emphasize this enough. That steam is what creates the crispy, crackly crust that makes French bread so special. Without it, you’ll get bread that’s still tasty but softer and paler.
Practice makes perfect. Your first loaf might not be Instagram-worthy, and that’s totally okay! Every time you make bread, you’ll get a better feel for the dough, the timing, and the shaping. By your third or fourth batch, you’ll feel like a pro.
Revive day-old bread. If your bread has lost some of its crispness, sprinkle it lightly with water and pop it in a 350°F oven for 5-10 minutes. The crust will crisp back up beautifully.
Freeze extra loaves. French bread freezes wonderfully. Wrap cooled bread tightly in plastic wrap, then in aluminum foil, and freeze for up to 3 months. Thaw at room temperature and refresh in the oven before serving. The USDA’s food safety guidelines recommend these storage methods for maintaining quality and safety.
Common Mistakes to Avoid When Making French Bread
Let’s talk about what can go wrong and how to prevent it:
Using water that’s too hot is probably the most common mistake. If your water is over 120°F, it’ll kill your yeast, and your dough simply won’t rise. When in doubt, go cooler rather than hotter, yeast is forgiving of lukewarm water but dead yeast is dead yeast.
Not kneading enough will give you weak gluten structure, which means your bread won’t rise well and the texture will be dense. Remember that windowpane test? It’s worth the effort.
Skipping or rushing the rise times is tempting, especially when you’re hungry, but bread needs time to develop flavor and structure. If your dough hasn’t doubled, be patient.
Forgetting the steam or baking in a dry oven will give you a tougher, paler crust. Those extra 30 seconds to create steam make all the difference.
Slicing too soon is something I’m guilty of all the time because warm bread is so irresistible. But seriously, give it at least 15-20 minutes to set up.
Here’s the good news: even if you make one of these mistakes, your bread will probably still taste pretty darn good. I’ve made plenty of imperfect loaves over the years, and they all got eaten enthusiastically.
Delicious Ways to Serve Your Homemade French Bread
Once you’ve mastered how to make French bread at home, you’ll find yourself looking for excuses to bake it constantly. Here are some of my favorite ways to enjoy it:
The classic approach is simply slicing it while it’s still warm, spreading on some good butter, and maybe a little jam or honey. Sometimes simple is best.
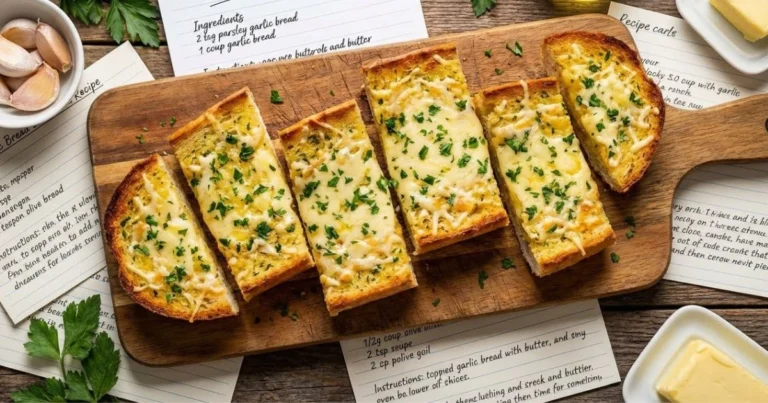
Turn it into killer garlic bread by slicing it lengthwise, spreading it with butter mixed with minced garlic and parsley, and broiling until golden and bubbly. Trust me, once you make homemade garlic bread with fresh-baked French bread, you’ll never go back to the store-bought stuff.
Use slices for bruschetta or crostini—toast them lightly, rub with a cut garlic clove, and top with diced tomatoes, basil, and a drizzle of olive oil.
French bread makes an incredible soup dipper. There’s nothing better than using a chunk of crusty bread to sop up tomato soup, French onion soup, or a hearty stew.
Make sandwiches! A fresh baguette is perfect for bánh mì, Italian subs, or even just turkey and cheese. The firm crust stands up well to hearty fillings without becoming soggy.
And if you have day-old bread, make the most incredible French toast you’ve ever tasted. The slightly dry bread soaks up the egg mixture perfectly without falling apart.
Once you taste your own fresh bread, you’ll find excuses to make it every week. Trust me on this.
More Delicious Bread Recipes to Try
If you’ve enjoyed learning how to make French bread and want to expand your bread-baking repertoire, I’ve got some other wonderful recipes you’ll love:
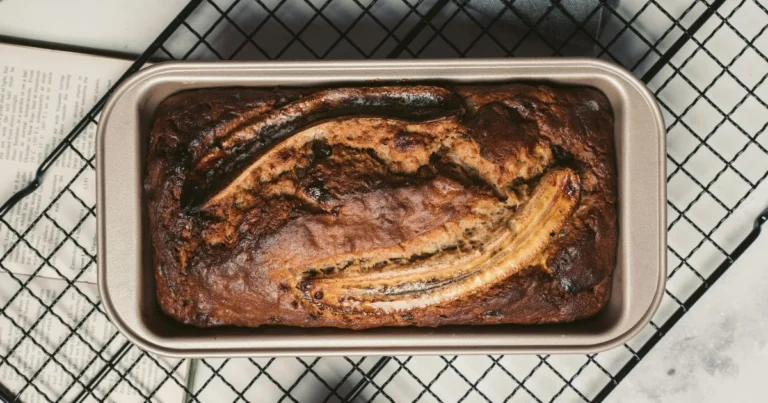
Once you’re comfortable with yeast breads, try my Simple Banana Bread Recipe with Just 2 Bananas, it’s a quick bread (no yeast!) that’s perfect for beginner bakers and uses up those overripe bananas sitting on your counter.
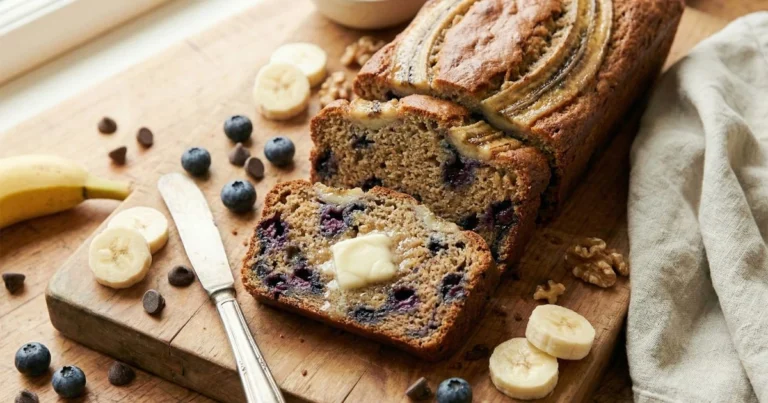
For something a little more special, The Best Lemon Blueberry Bread Recipe is bright, tender, and absolutely delicious with your morning coffee. It’s another quick bread that comes together in minutes.
If you’re ready to explore sourdough baking, my Blueberry Cream Cheese Sourdough Recipe brings together tangy sourdough, bursts of sweet blueberries, and creamy pockets of cream cheese for a truly standout loaf. It’s a bit more advanced, but if you can make French bread, you can definitely handle it!
Frequently Asked Questions About Making French Bread
Is it possible to make French bread without using a stand mixer?
Absolutely! This recipe is specifically designed for hand kneading, and honestly, I think kneading by hand gives you a better feel for the dough. It’s a wonderful arm workout and surprisingly meditative. Many professional bakers actually prefer hand kneading for certain breads because you can feel exactly when the gluten has developed properly.
How long does homemade French bread stay fresh?
Fresh bread is best within 1-2 days, which is actually part of its charm, it encourages you to bake often and enjoy it fresh! Store your bread in a paper bag or bread box at room temperature. Don’t refrigerate it, as that actually makes bread go stale faster. For longer storage, slice and freeze your bread for up to 3 months, then toast individual slices as needed.
How does French bread differ from a baguette?
Great question! A baguette is actually a type of French bread, specifically, it’s the long, skinny shape that’s become iconic. “French bread” is a broader term that includes baguettes, batards (shorter and thicker), and boules (round loaves). They all use the same basic dough, just shaped differently. This recipe works beautifully for any of these shapes.
Can you swap bread flour with all-purpose flour?
Yes, you absolutely can! Bread flour will give you a slightly chewier texture and better rise because of its higher protein content, but all-purpose flour still makes delicious French bread. I’ve used both many times, and both versions get devoured. If you’re just learning how to make French bread, start with whatever flour you have on hand.
Why is my French bread dense and not airy?
The most common causes are: not kneading long enough (weak gluten), not letting the dough rise long enough (underdeveloped), or using old/dead yeast that didn’t activate properly. Make sure your yeast foams when you proof it, knead until you can pass the windowpane test, and be patient with the rising times. Dense bread can also happen if you added too much flour during kneading, remember, a slightly tacky dough is better than a dry one.
Do I really need to add steam when baking?
If you’re aiming for a true French bread feel with a crisp, golden, crackly crust, then yes! The steam keeps the surface of the bread moist during the first phase of baking, which allows the bread to expand to its fullest (oven spring) before the crust hardens. Without steam, you’ll still get bread, but it’ll have a tougher, paler, less impressive crust. The steam step takes literally 10 seconds and makes such a huge difference that it’s absolutely worth it.
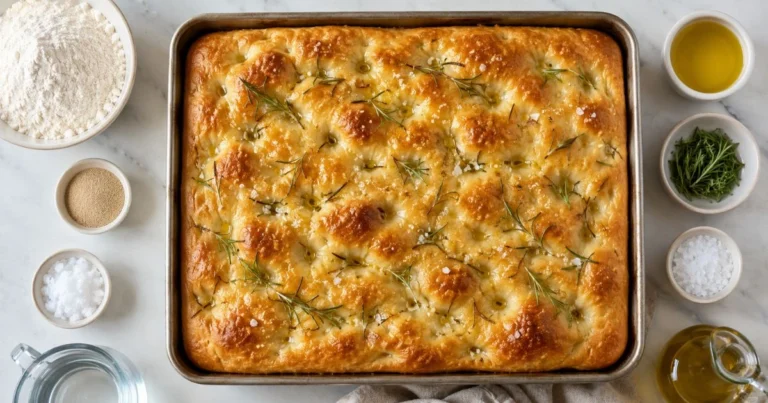
Can I add herbs or cheese to my French bread dough?
While traditional French bread is plain, you can absolutely experiment once you’re comfortable with the basic recipe! Add dried herbs like rosemary or thyme during the kneading stage, or fold in shredded cheese after the first rise. Just keep in mind that additions will change the texture slightly, cheese can make the crumb denser and herbs can interfere with gluten development if you add too much. Begin with a small amount and adjust to your taste as you go.
Time to Bake!
You made it! You now know everything you need to know about how to make French bread at home, from activating your yeast to scoring your loaves to creating that perfect crackling crust. More importantly, you know it’s not scary, it’s not complicated, and it definitely doesn’t require you to be a professional baker.
The truth is, bread baking is one of the most forgiving and rewarding kitchen skills you can learn. Yes, your first loaf might be a little lopsided. The crust might not be quite as crispy as you’d hoped. The scoring might be a bit wonky. But I guarantee it will still taste absolutely delicious, and you’ll feel an incredible sense of accomplishment when you slice into something you made from four simple ingredients and your own two hands.
Don’t get too hung up on perfection. Some of the most delicious bread I’ve ever made has looked decidedly rustic and homemade. That’s part of its charm! The important thing is to jump in, get your hands floury, and start baking.
So here’s what I want you to do: pick a day this week when you have a few hours at home (remember, most of that is hands-off rising time). Get your ingredients together. Put on some music, pour yourself a cup of coffee or tea, and give it a try. Follow these steps, be patient with the process, and trust your instincts.
When you pull that first golden loaf from your oven and hear that crust crackle as it cools, you’re going to feel like a kitchen magician. And when your family or roommates or neighbors smell what you’ve made? You’ll officially be everyone’s favorite person.
Now go preheat that oven and fill your kitchen with the most amazing aroma. You’ve absolutely got this!
I’d love to hear how your French bread turns out! Drop a comment below and let me know if you tried this recipe, what you served it with, or if you have any questions. Did you make it into garlic bread? Serve it with soup? Turn it into the world’s best sandwich? And if you loved it, share it with a friend who’s been wanting to try bread baking, there’s nothing better than freshly baked bread except sharing it with someone you love. Happy baking!
4 Comments
Comments are closed.