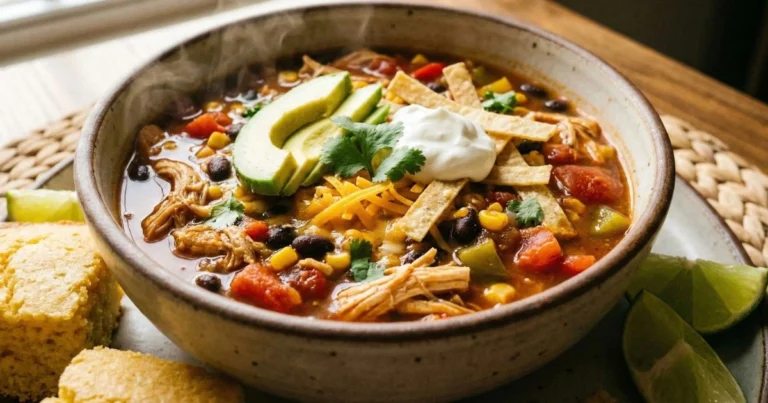
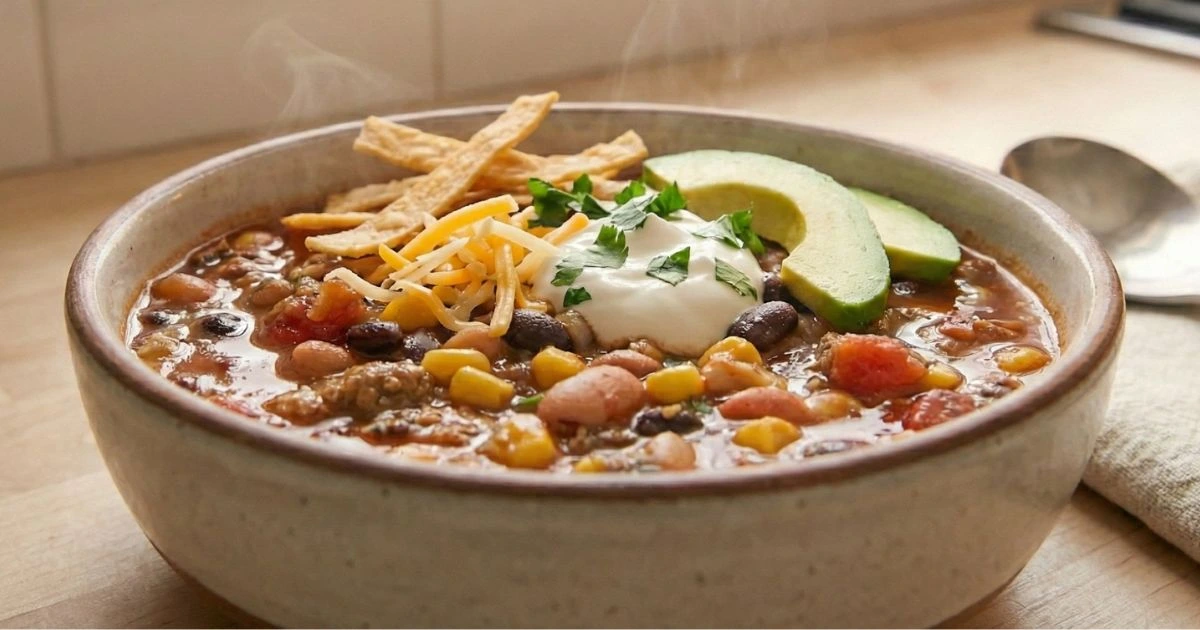
Taco soup recipe explained with simple steps and basic pantry staples
Easy Taco Soup Recipe: A 30-Minute Meal Using Pantry Staples
You’re about to discover why taco soup has earned its place as one of America’s most reliable weeknight dinners. This isn’t a complicated recipe that demands specialty ingredients or advanced cooking techniques. What you’re learning today is a proven, straightforward method that transforms basic pantry staples into a satisfying meal that feeds your family in just 30 minutes.
If you can brown ground beef and open a few cans, you can make exceptional taco soup. I’m going to walk you through every step with the confidence that comes from making this recipe countless times. You’ll understand not just what to do, but why each step matters, because when you understand the reasoning, you become a better cook.
What Is Taco Soup?
Taco soup is a hearty, one-pot Mexican-inspired dish that combines seasoned ground meat, beans, corn, tomatoes, and taco seasoning in a flavorful broth. Unlike traditional soups that simmer for hours, your taco soup comes together in roughly 30 minutes, making it the perfect solution for busy weeknights when you need something substantial on the table fast.
The genius of this recipe lies in its flexibility and forgiveness. You’re building layers of flavor using ingredients you likely already have in your pantry: canned beans, diced tomatoes, corn, and ground beef or turkey. The result is a thick, chili-like soup that delivers all the flavors of your favorite tacos without the assembly work or mess.
Why This Recipe Works Every Time
This taco soup recipe succeeds because it’s built on three fundamental cooking principles that professional chefs rely on:
Flavor layering creates depth by browning meat and sautéing aromatics before adding liquids. This develops complex flavors that can’t be achieved by simply dumping everything into a pot.
Proper seasoning ratios ensure you get bold taste without overwhelming saltiness. The balance between taco seasoning and liquid is critical, and I’ve tested these proportions to give you consistent results.
Minimal cooking time works because you’re using pre-cooked canned ingredients. You only need enough time to meld the flavors together—no lengthy simmering required.
According to the USDA’s Food and Nutrition Service, canned beans and tomatoes retain nearly identical nutritional value to their fresh counterparts while offering significantly longer shelf life. This means you can keep these ingredients stocked and ready without sacrificing quality or nutrition.
Essential Ingredients For Taco Soup Recipe
Core Ingredients You’ll Need
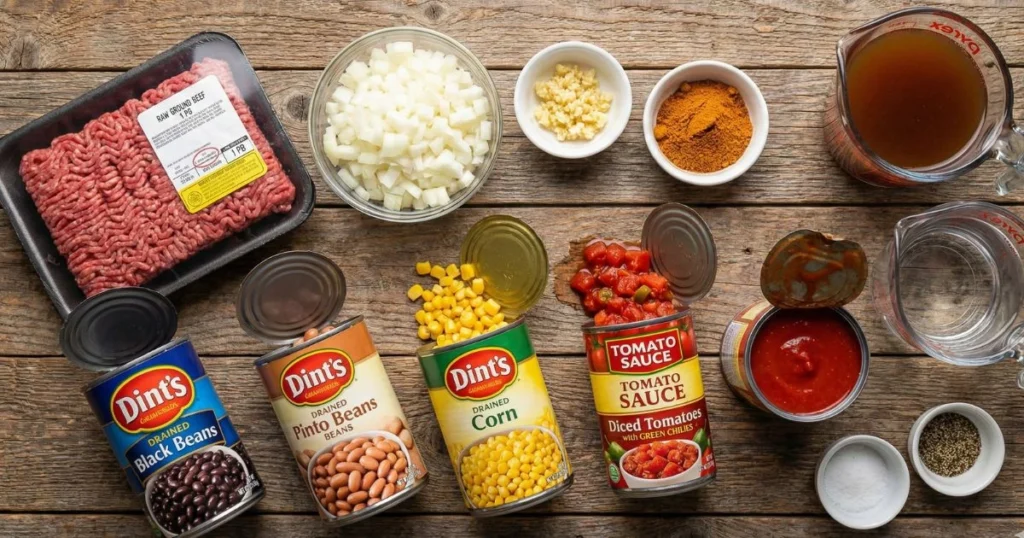
Gather these ingredients before you start cooking:
- 1 pound ground beef, or substitute ground turkey for a lighter option
- 1 medium onion, diced (yellow or white)
- 2 cloves garlic, minced
- 1 (1-ounce) packet taco seasoning, or about 2 tablespoons if using homemade
- 1 (15-ounce) can black beans, rinsed and drained
- 1 (15-ounce) can pinto beans, rinsed and drained
- 1 (15-ounce) can corn, drained, or about 1½ cups frozen corn
- 1 can (14.5 oz) diced tomatoes with green chilies (Ro*Tel brand works perfectly)
- 1 can (15 oz) tomato sauce
- 2 cups beef broth (or chicken broth)
- 1 cup water
- Salt and pepper to taste
Toppings That Elevate Your Soup
Don’t skip the toppings, they’re what transform good taco soup into great taco soup:
- Shredded cheddar cheese or Mexican blend
- Sour cream or Greek yogurt
- Crushed tortilla chips or Fritos
- Fresh cilantro, chopped
- Diced avocado or guacamole
- Sliced jalapeños (fresh or pickled)
- Lime wedges
- Diced red onion
- Sliced black olives
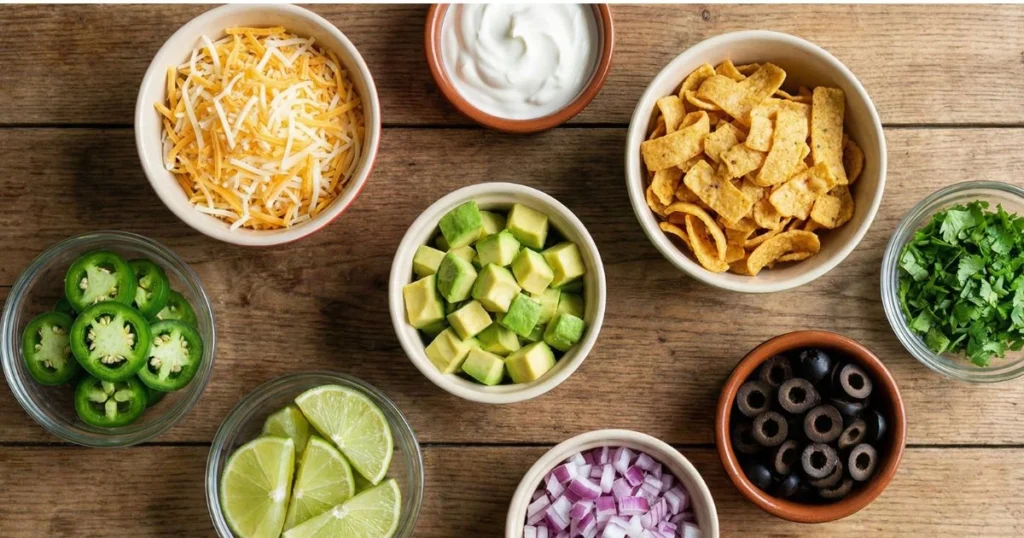
Smart Ingredient Substitutions
You can adapt this recipe to fit your dietary needs without compromising flavor:
For vegetarian taco soup: Replace the ground beef with an additional can of beans (try kidney or navy beans) or 1 pound of crumbled firm tofu that you’ve sautéed until golden.
For low-sodium versions: Choose no-salt-added canned goods and use homemade taco seasoning so you control the salt level. These easy substitutions can help cut sodium by about 40%.
For gluten-free requirements: Verify that your taco seasoning is certified gluten-free. Most brands are naturally gluten-free, but always check the label as some use wheat-based anti-caking agents.
For dairy-free diets: Skip the cheese and sour cream toppings, or use dairy-free alternatives. Your soup base is already dairy-free.
Step-by-Step Taco Soup Recipe Instructions
Step 1: Brown the Meat Properly (5 Minutes)
Preheat a large pot or Dutch oven over medium-high heat until it’s hot. You don’t need to add oil, the beef contains enough fat. Stir in the ground beef, crumbling it into smaller pieces with a wooden spoon or spatula as it cooks. Cook for 5-7 minutes until no pink remains.
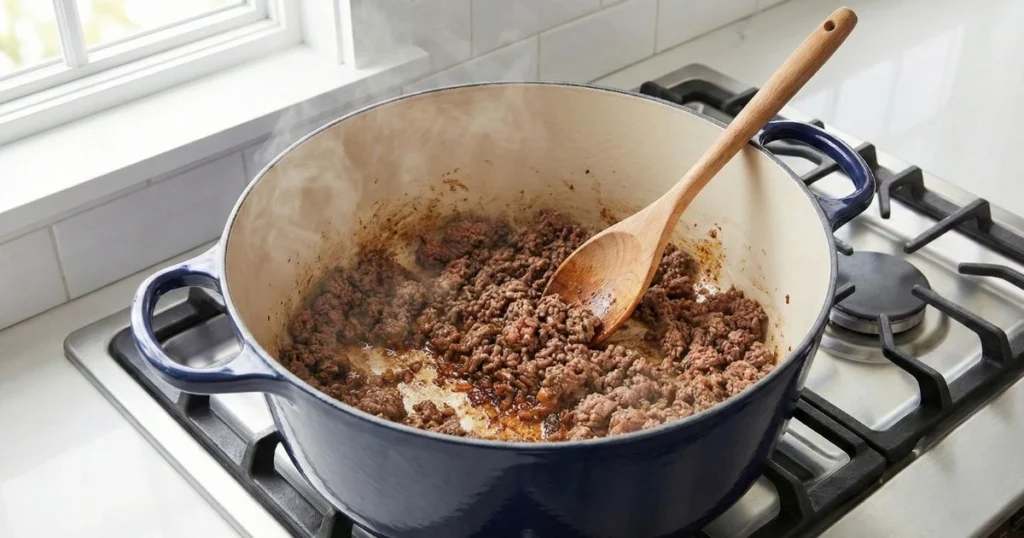
Here’s why this step matters: Browning develops the Maillard reaction, a chemical process that creates hundreds of flavor compounds. You’re not just cooking the meat through; you’re building a flavor foundation. Let some of the meat develop caramelization on the bottom of your pan. Those brown bits (fond) contain concentrated flavor.
Once your meat is fully browned, drain the excess fat if there’s more than about 1 tablespoon. You want to keep a little fat because it carries flavor, but too much will make your soup greasy.
Step 2: Sauté Your Aromatics (3 Minutes)
Add your diced onion directly to the pot with the cooked beef. Sauté for 2-3 minutes, stirring occasionally, until the onion softens and becomes translucent. Now add your minced garlic and cook for just 30 seconds until it becomes fragrant.
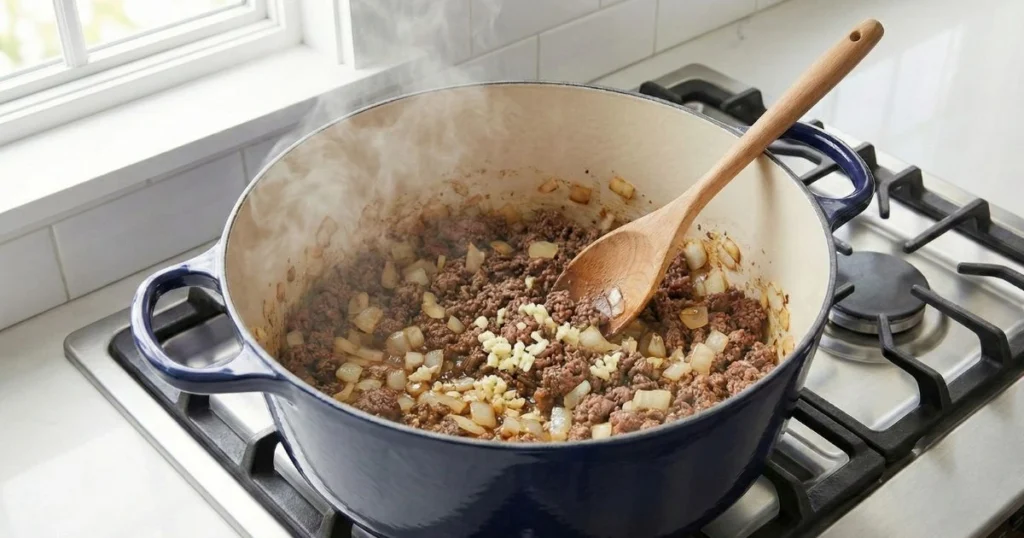
Why this timing is critical: Garlic burns quickly, and burnt garlic tastes bitter. By adding it after the onions have softened, you ensure it cooks just long enough to release its aromatic compounds without scorching. You’ll know it’s ready when you can smell that unmistakable garlic aroma.
Step 3: Bloom Your Spices (1 Minute)
Sprinkle your taco seasoning over the meat and onion mixture. Stir constantly for 30-60 seconds, allowing the spices to toast slightly in the residual fat.
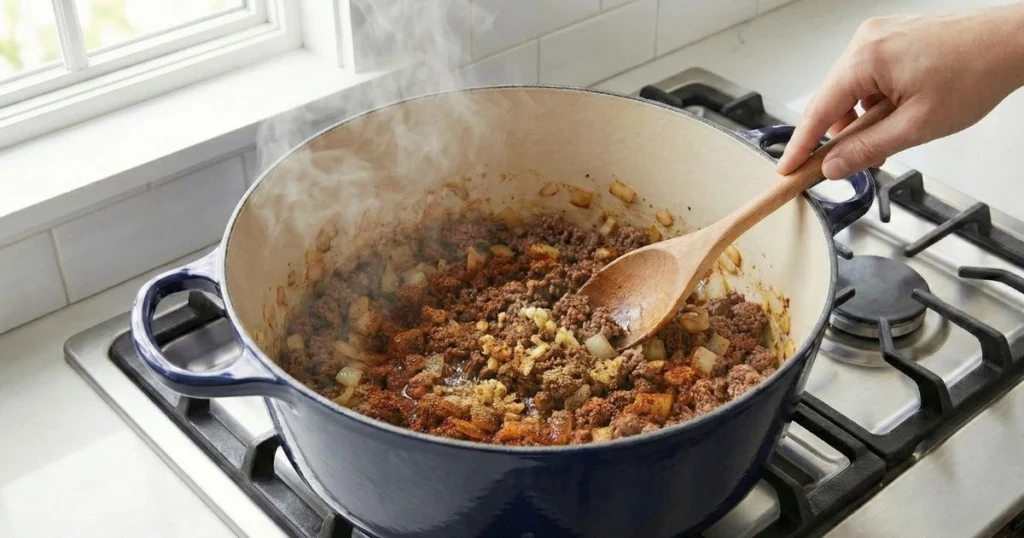
This technique is called blooming, and it’s a game-changer. Toasting dried spices in fat intensifies their flavors by releasing essential oils. This creates a more robust, complex base than simply dumping spices into liquid later. You’ll notice the spices become more fragrant—that’s your cue that they’re ready.
Step 4: Add Your Canned Ingredients (2 Minutes)
Now you’ll add your canned ingredients in this order:
- Drained and rinsed black beans
- Drained and rinsed pinto beans
- Drained corn
- Diced tomatoes with green chilies (include the liquid from this can)
- Tomato sauce
Stir everything together thoroughly, making sure the taco seasoning coats all the ingredients evenly.
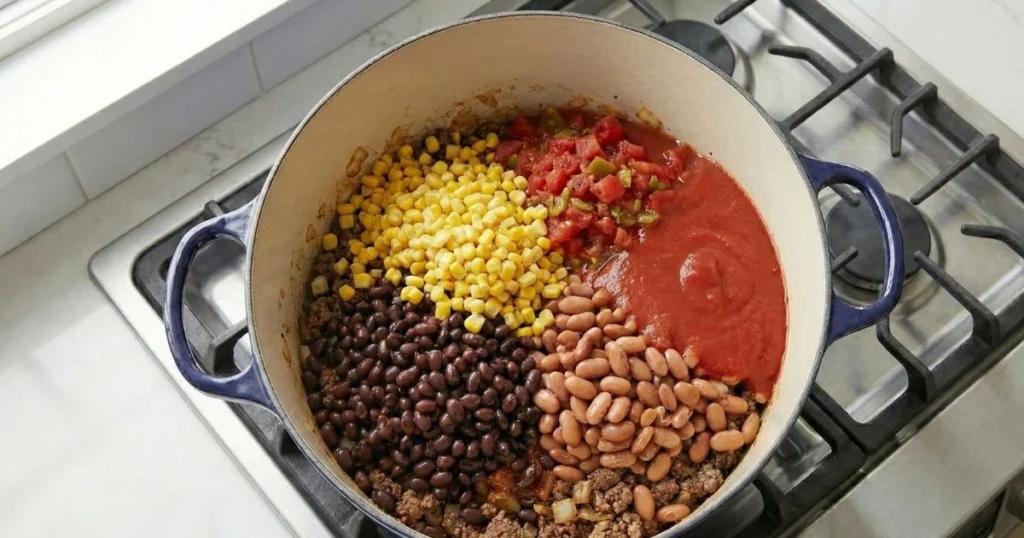
Important note: Always drain and rinse your beans. The liquid in canned beans (called aquafaba) contains excess sodium and starches that can make your soup too thin and salty. Rinsing removes up to 40% of the sodium according to research from the American Heart Association.
Step 5: Add Liquids and Simmer (15-20 Minutes)
Pour in your beef broth and water. Turn the heat up to high and bring the mixture to a rolling boil. Once it’s boiling, reduce your heat to medium-low, partially cover your pot, and let it simmer for 15-20 minutes. Stir occasionally to prevent sticking.
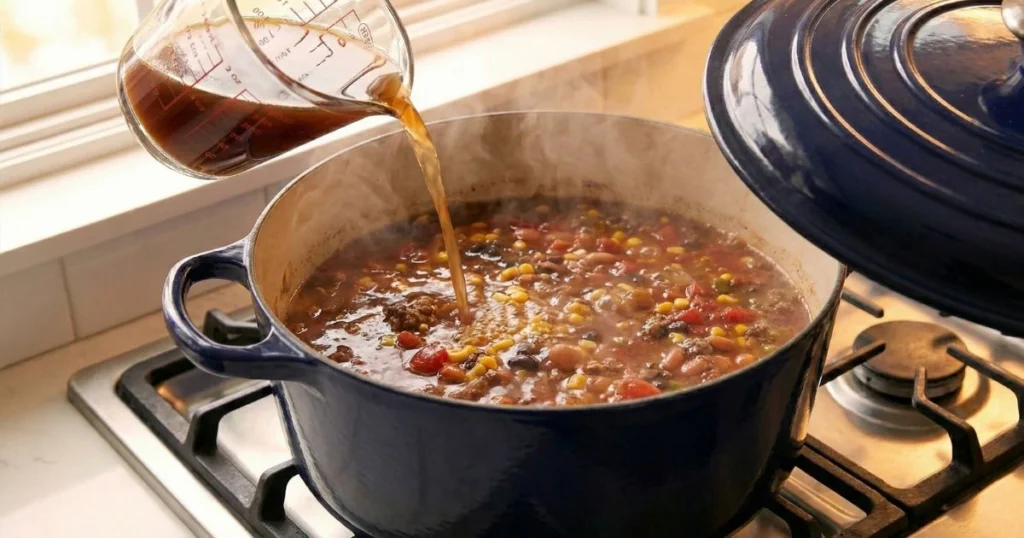
What’s happening during this simmer: The taco seasoning hydrates fully, the flavors marry together, and the soup thickens slightly as starches from the beans break down. You’ll notice the consistency becoming more cohesive and soup-like rather than watery.
If you prefer a thicker soup, leave the lid off during simmering. The evaporation will concentrate the flavors and thicken the consistency. For a brothier soup, keep the lid on.
Step 6: Taste and Adjust Seasoning
This is the most important step that many home cooks skip. Taste your soup with a clean spoon. Ask yourself: Does it need more salt? More heat? More acidity?
Adjust with:
- Salt and black pepper as needed
- ¼ teaspoon cayenne pepper for more heat
- A squeeze of lime juice for brightness
- A pinch of sugar if the tomatoes taste too acidic
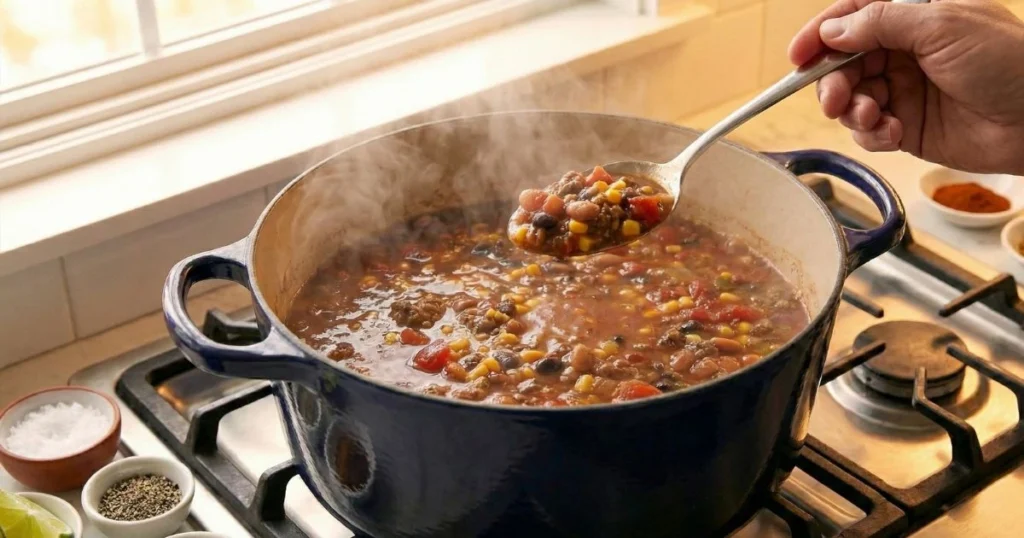
Keep tasting as you adjust. Your palate is the best measuring tool you have.
Step 7: Serve with Strategic Toppings
Ladle your soup into bowls and set out your toppings buffet-style. Let everyone customize their bowl. This isn’t just about preference, it’s about texture and temperature contrast.
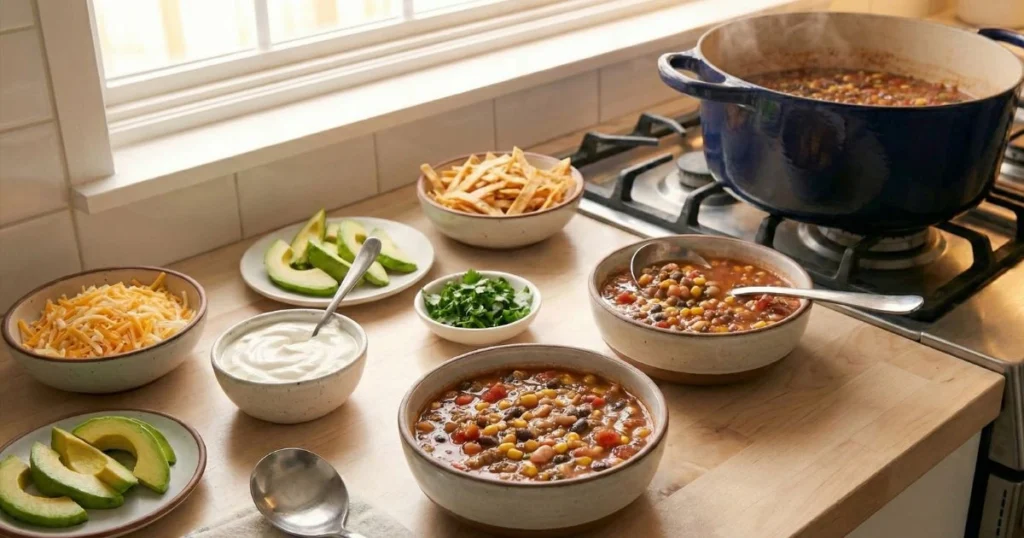
The combination of hot soup, cool sour cream, crunchy chips, and creamy avocado creates a multi-dimensional eating experience. According to food science research published in the Journal of Food Science, textural contrast significantly enhances satisfaction and perceived flavor intensity.
Pro Tips for the Best Taco Soup
Add Lime Juice at the End
Squeeze fresh lime juice over your finished soup just before serving. The acidity brightens all the flavors and cuts through the richness. Start with one lime for the whole pot and adjust from there.
Research shows acidic ingredients enhance the perception of saltiness, allowing you to use less sodium while maintaining flavor impact. This is why professional chefs finish so many dishes with citrus or vinegar.
Make It a Day Ahead
Like chili, your taco soup tastes even better the next day as flavors continue to develop and meld. If you have time, make it a day ahead, refrigerate it overnight, and reheat it when you’re ready to serve. You’ll notice a significant improvement in depth and complexity.
Don’t Skip the Toppings
Your toppings aren’t just garnish, they’re essential components that provide textural contrast and temperature variation. The cool sour cream against hot soup, the crunch of tortilla chips against soft beans, the brightness of cilantro against rich meat—these contrasts make each bite interesting.
Adjust Consistency to Your Preference
If your soup is too thin: Simmer it uncovered for an additional 10 minutes to reduce liquid, or mash ½ cup of the beans against the side of your pot with a spoon. This releases starches that thicken the soup naturally without adding any additional ingredients.
If your soup is too thick: Add additional broth or water, ¼ cup at a time, until you reach your desired consistency. Remember, the soup will thicken as it sits, so err on the side of slightly thinner if you’re making it ahead.
Control the Heat Level
You can adjust the spiciness to suit your family’s preferences:
For mild soup: Use regular diced tomatoes instead of those with green chilies, and choose mild taco seasoning.
For medium heat: Stick with the recipe as written using diced tomatoes with green chilies.
For spicy soup: Add diced jalapeños with the onions (leave the seeds in for maximum heat), use hot taco seasoning, and include ½ teaspoon cayenne pepper. Offer sliced fresh jalapeños and hot sauce as toppings.
Taco Soup Recipe Variations You Should Try
Slow Cooker Taco Soup
You can easily adapt this recipe for your slow cooker:
- Brown your meat and sauté your onions and garlic in a skillet first (don’t skip this, it’s crucial for flavor)
- Move the browned meat mixture into the slow cooker
- Add all remaining ingredients
- Let it cook on LOW for 6–8 hours, or speed things up by cooking on HIGH for 3–4 hours.
The advantage: Even deeper flavor development with truly hands-off cooking. Your slow cooker provides gentle, even heat that extracts maximum flavor from every ingredient.
Instant Pot Taco Soup
For the fastest version, use your Instant Pot:
- Use the sauté function to brown your meat and aromatics directly in the pot
- Add all remaining ingredients
- Pressure cook on HIGH for 10 minutes
- Natural release for 5 minutes, then quick release the remaining pressure
The advantage: You’ll have finished taco soup in under 30 minutes total, and pressure cooking extracts flavors more efficiently than stovetop simmering.
White Chicken Taco Soup
For a lighter, tangier version, make these substitutions:
- Replace ground beef with 1 pound cooked, shredded chicken (rotisserie chicken works perfectly)
- Replace black and pinto beans with 2 cans of white beans (cannellini or great northern)
- Replace beef broth with chicken broth
- Add 1 can (4 oz) of diced green chilies
- Stir in 1 teaspoon of ground cumin to add extra warmth and depth.
The result: A lighter soup with bright, Southwestern flavors that pairs beautifully with lime and cilantro.
Vegetarian Taco Soup
You can make excellent vegetarian taco soup by replacing the ground beef with:
- 1 additional can each of black beans and pinto beans (3 cans total)
- 1 pound of crumbled tempeh or extra-firm tofu, sautéed until golden brown
- 2 cups of cooked brown or green lentils
- 2 cups of small-diced sweet potato for heartiness and natural sweetness
Add 1 diced bell pepper (any color) with your onions for extra texture and vitamins.
Keto-Friendly Low-Carb Taco Soup
If you’re following a low-carb diet:
- Omit the beans and corn
- Add 2 cups of diced zucchini
- Add 1 cup of diced bell peppers
- Add 8 oz of cream cheese during the last 5 minutes of cooking for creaminess
- Increase the meat to 1½ pounds
Top with full-fat sour cream, cheese, and avocado. Skip the tortilla chips.
Storing and Reheating Your Taco Soup
Refrigerator Storage
Store your cooled taco soup in an airtight container in your refrigerator for up to 4-5 days. The flavor actually improves after the first day as the seasonings continue to penetrate the beans and vegetables.
Make sure you let your soup cool to room temperature before refrigerating. Putting hot soup directly in your fridge raises the internal temperature and can compromise food safety.
Freezer Storage
Taco soup freezes exceptionally well for up to 3 months, making it perfect for batch cooking and meal prep. Follow these guidelines for best results:
- Cool your soup completely before freezing
- Portion it into freezer-safe containers, leaving 1 inch of headspace for expansion (liquids expand when frozen)
- Label each container with the date and contents
- Freeze flat if using freezer bags, they’ll stack more efficiently and thaw faster
- Thaw overnight in your refrigerator for food safety
- Reheat on your stovetop over medium heat, stirring occasionally
Pro tip: Freeze individual portions in single-serving containers for quick grab-and-go lunches. You can microwave these straight from frozen in about 5-6 minutes.
Don’t freeze your toppings. Sour cream, cheese, and avocado don’t freeze well. Add these fresh when you’re ready to serve.
Reheating Methods
Stovetop method (recommended): Transfer your soup to a pot and reheat over medium heat, stirring occasionally, for about 10 minutes until heated through. If it’s thickened too much during storage, add a splash of broth or water to loosen it up.
Microwave method: Heat in 2-minute intervals on high power, stirring between each interval, until steaming hot throughout. This usually takes 6-8 minutes for refrigerated soup.
From frozen: For best results, thaw overnight in your refrigerator. If you’re in a rush, you can reheat from frozen on your stovetop—just add ½ cup of water or broth and heat gently over medium-low heat, stirring frequently to prevent scorching.
Nutritional Information
Knowing what goes into your food empowers you to make more informed choices. Here’s the breakdown per serving (based on 6 servings, calculated without toppings):
- Calories: 320
- Protein: 25g
- Carbohydrates: 35g
- Fiber: 9g
- Fat: 9g
- Sodium: 890mg
Healthier modifications: Swapping in low-sodium broth and no-salt-added canned products can reduce sodium content by nearly 40%. Choosing ground turkey instead of beef reduces fat by roughly 30% and cholesterol significantly.
The high fiber content (9g per serving) means this soup keeps you satisfied longer. According to the Mayo Clinic, high-fiber meals help regulate blood sugar and promote digestive health.
What to Serve with Taco Soup
Complementary Side Dishes
Your taco soup is substantial enough to stand alone, but these sides round out the meal beautifully:
Cornbread: The slight sweetness balances the spiced soup perfectly. Try jalapeño cheddar cornbread if you want to amplify the Mexican-inspired theme. The butter you spread on warm cornbread creates a luxurious contrast to the soup’s acidity.
Mexican rice or cilantro lime rice: Provides a hearty base while absorbing the rich, flavorful broth. Some people even add a scoop of rice directly into their soup bowl.
Simple green salad: Offers refreshing contrast, especially with a lime-cilantro vinaigrette. The crisp, cool lettuce provides textural relief from the hot, hearty soup.
Cheese quesadillas: Turn your meal into a complete Mexican feast. Kids especially love this combination. Cut the quesadillas into wedges for dipping into the soup.
Warm flour tortillas: Perfect for scooping and sopping up every last drop of that flavorful broth.
Beverage Pairings
Consider these drinks to complete your meal:
- Mexican lager (Corona, Modelo, Pacifico) or light beer
- Margaritas (frozen or on the rocks with salt)
- Agua fresca (watermelon, cucumber-lime, or hibiscus)
- Iced tea with lime wedges
- Mexican hot chocolate for a cozy winter meal
- Sparkling water with fresh lime
Common Mistakes to Avoid
Not Draining and Rinsing Your Beans
The liquid in canned beans (aquafaba) contains excess sodium and can make your soup too thin and salty. Always drain your beans in a colander and give them a quick rinse under cold water. This simple step removes up to 40% of the sodium and gives you better control over your soup’s consistency.
Overcooking the Soup
Since all your ingredients are already cooked (canned beans, canned tomatoes, cooked meat), you only need to simmer long enough to blend the flavors—15 to 20 minutes is sufficient. Longer cooking won’t improve your soup and may cause your vegetables to become mushy and lose their structure.
Using Low-Quality Taco Seasoning
Read your labels carefully. Quality taco seasoning should list spices first, not salt or maltodextrin. Many commercial blends are more than 50% salt and filler. Better yet, make your own blend (recipe below) to control sodium and avoid anti-caking agents and preservatives.
Skipping the Browning Step
Even when you’re short on time, don’t skip browning your meat. This step creates foundational flavor through the Maillard reaction that you simply cannot replicate by adding raw meat to liquid. Those five minutes of browning are where the flavor complexity begins.
Adding Dairy Too Early
If you’re stirring sour cream or cheese directly into your soup (rather than using them as toppings), wait until the very end and remove the pot from heat first. High heat can cause dairy to curdle and separate, creating an unappetizing texture.
Not Tasting Before Serving
Always taste your soup before you serve it. Canned products vary in sodium content, tomatoes vary in acidity, and taco seasonings vary in strength. You need to taste and adjust to achieve the perfect balance for your specific ingredients.
Making Your Own Taco Seasoning
Homemade Taco Seasoning Blend
Mix these spices to replace one 1-ounce packet of store-bought seasoning:
- 1 tablespoon chili powder
- 1½ teaspoons ground cumin
- 1 teaspoon paprika (smoked paprika adds depth)
- 1 teaspoon garlic powder
- 1 teaspoon onion powder
- ½ teaspoon dried oregano (Mexican oregano is ideal)
- ½ teaspoon salt (adjust to your preference)
- ¼ teaspoon black pepper
- ¼ teaspoon cayenne pepper (optional, for heat)
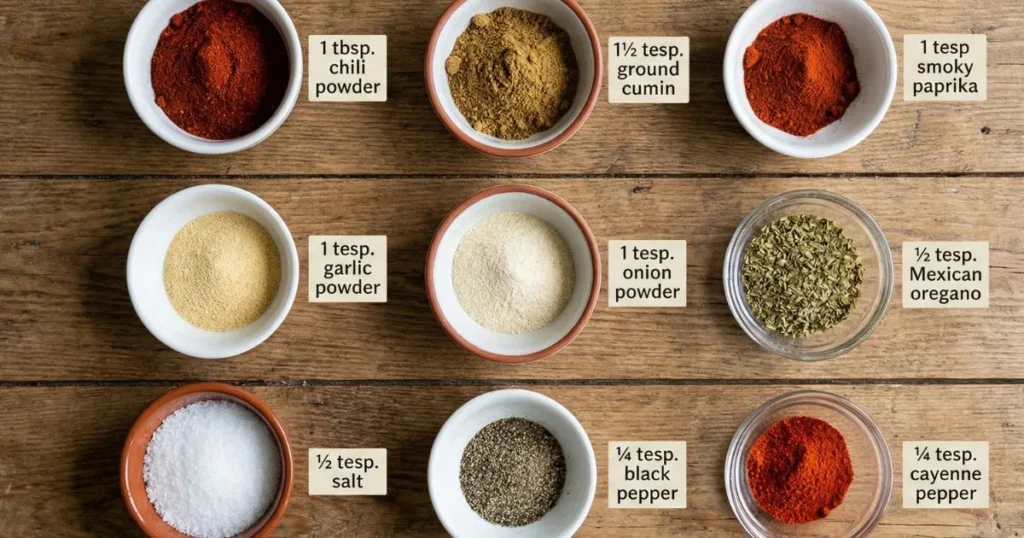
Why make your own? You eliminate anti-caking agents, added sugar, and excessive sodium. You get complete control over every component. Plus, it’s more economical, this blend costs about 50 cents compared to $1.50-2.00 for packaged seasoning.
Storage tip: Make a quadruple batch and store it in an airtight container in your spice cabinet for up to 6 months. Label it with the date so you know when to make a fresh batch.
Frequently Asked Questions About This Taco Soup Recipe
Can I make taco soup without beans?
Yes, you can make taco soup without beans. Replace them with 3 cups total of additional vegetables like diced bell peppers, zucchini, or cauliflower. You could also add an extra pound of meat. Keep in mind that removing beans significantly reduces the protein and fiber content, so you’re changing the nutritional profile substantially.
How do I make my taco soup thicker?
You have several options for thickening your soup. Add 2 tablespoons of masa harina (corn flour) mixed with ¼ cup water and simmer for 5 minutes. Alternatively, mash ½ cup of the beans against the side of your pot to release starches that thicken naturally. You can also stir in a handful of crushed tortilla chips—they’ll dissolve and thicken your soup while adding authentic corn flavor. Finally, simply simmering uncovered for an extra 10 minutes reduces the liquid through evaporation.
Can I use ground turkey in this taco soup recipe?
Absolutely. Ground turkey is a great substitute and makes the soup leaner, cutting the fat content by roughly 30%. Use 93% lean ground turkey for the best balance of flavor and nutrition. Since turkey is slightly milder than beef, consider adding an extra ½ teaspoon of cumin and a pinch of smoked paprika to boost the depth of flavor.
What’s the best way to freeze taco soup leftovers?
Cool your soup completely before freezing to maintain food safety and quality. Portion it into freezer-safe containers, leaving 1 inch of headspace to allow for expansion during freezing. Label each container with the date and contents. Your soup freezes well for up to 3 months. Thaw it overnight in your refrigerator and reheat on your stovetop. Never freeze your soup with toppings like sour cream, cheese, or avocado, add these fresh when you serve it.
How long can taco soup be stored in the refrigerator?
Properly stored in an airtight container, your taco soup stays fresh for 4-5 days in the refrigerator. The flavor actually improves after the first day as the seasonings penetrate the ingredients more deeply. If you notice any off odors, visible mold, or sliminess, discard the soup immediately—when in doubt, throw it out.
Is it possible to make this taco soup in a slow cooker?
Yes, and slow cooker taco soup develops even richer flavors. Brown your meat and sauté your onions and garlic in a skillet first—this step is crucial for developing the flavor foundation. Then transfer everything to your slow cooker along with the remaining ingredients. Allow it to cook on LOW for 6–8 hours, or on HIGH for 3–4 hours. The extended gentle cooking extracts maximum flavor from every ingredient.
Is taco soup gluten-free?
Your taco soup base is naturally gluten-free, but you must check your taco seasoning packet carefully. Most major brands like McCormick and Simply Organic offer certified gluten-free options, but some brands use wheat-based anti-caking agents. If you’re using store-bought broth, verify it’s gluten-free as well, though most are. When in doubt, make your own taco seasoning using the recipe provided earlier in this article.
What can I substitute for taco seasoning?
You can easily make your own substitute using spices you probably already have. Combine 1 tablespoon chili powder, 1½ teaspoons cumin, 1 teaspoon each of garlic powder and onion powder, ½ teaspoon oregano, and salt and pepper to taste. This homemade blend gives you complete control over sodium levels and eliminates the additives and preservatives found in many packaged seasonings.
How can I make my taco soup spicier?
Add diced jalapeños (seeds included) with your onions for heat that builds throughout the soup. Use hot taco seasoning instead of mild. Include ½ teaspoon of cayenne pepper or a few dashes of your favorite hot sauce. For maximum control, start conservatively and add heat gradually, tasting as you go—you can always add more heat, but you can’t remove it once it’s there.
What’s the difference between taco soup and chili?
Taco soup typically has a brothier, more soup-like consistency with visible liquid, includes corn as a standard ingredient, and uses taco seasoning as its primary spice blend. Chili is thicker and stew-like, focuses primarily on beans and meat without corn, and traditionally uses chili powder and cumin rather than taco seasoning. Both are delicious comfort foods, but taco soup is generally lighter, faster to prepare, and more kid-friendly.
Make This Taco Soup Recipe Your Own Tonight
You now have everything you need to make exceptional taco soup that your family will request again and again. This recipe works because it’s built on proven cooking techniques, uses accessible ingredients, and delivers consistent results every single time.
The beauty of taco soup lies not just in its simplicity, but in its versatility. Start with this master recipe, then customize it to match your preferences. Make it vegetarian, try the slow cooker method, experiment with the white chicken variation using our Easy Chicken Taco Soup recipe, or create your own signature version by adjusting the heat level and toppings.
Here’s what you should do right now: Check your pantry for the ingredients you already have, make a quick shopping list for anything you’re missing, and plan to make this soup within the next few days while the instructions are fresh in your mind. Make extra, this soup freezes beautifully, and you’ll thank yourself later when you have a homemade meal ready to go on a busy night.
Once you’ve mastered this recipe, explore other comforting soup recipes that use similar one-pot techniques. Try our Copycat Olive Garden Chicken Gnocchi Soup Recipe for Italian-inspired comfort, the bright and refreshing Lemon Chicken Orzo Soup for a lighter option, or the rich and satisfying Creamy Loaded Baked Crockpot Potato soup when you’re craving something indulgent. Each builds on similar techniques and flavor profiles, expanding your cooking confidence and repertoire.
Don’t just read this recipe, make it. Your family is waiting for a delicious, satisfying meal, and you’re now equipped to deliver it with confidence. Get cooking, and enjoy the compliments that are coming your way.