Ciabatta Bread Recipe
Ciabatta Bread Recipe: How to Make Authentic Italian Bread at Home
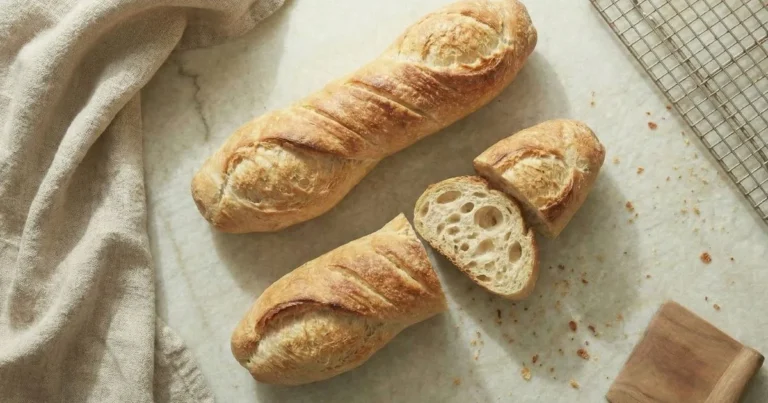
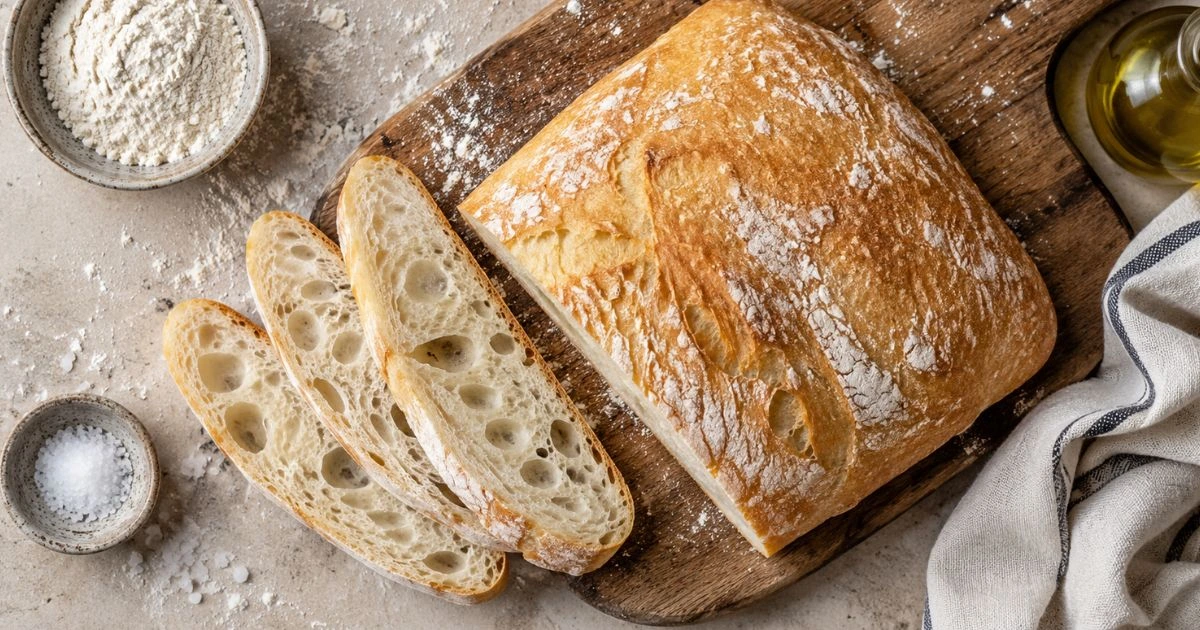
There’s a moment when you pull a golden loaf of ciabatta from your oven, that crackly crust, those gorgeous air holes peeking through each slice, that impossibly chewy interior, and you think, I actually made that. If you’ve always assumed this kind of bakery-quality bread was out of reach at home, let me be the one to tell you: it absolutely isn’t.

Ciabatta Bread Recipe
Ingredients
Method
- Combine flour, yeast, and salt. Add warm water and olive oil. Mix until a wet, sticky dough forms.
- Cover and let rise at room temperature for 1.5–2 hours until doubled.
- Every 30 minutes during the rise, perform 4 stretch and folds to build gluten.
- Turn dough onto a floured surface, divide into two pieces, and gently shape into rectangles.
- Cover shaped loaves and let rest 45–60 minutes until puffy.
- Bake at 450°F (230°C) with steam for 22–25 minutes until deep golden brown.
This ciabatta bread recipe walks you through every single step, from mixing your ingredients to pulling a perfectly baked loaf out of the oven. Whether you’re brand new to bread baking or just haven’t tried ciabatta before, you’re in exactly the right place. Grab your flour, and let’s get started.
What Is Ciabatta Bread? (And Why You’ll Love It)
Ciabatta (pronounced cha-BAH-tah) is a classic Italian white bread whose name literally means “slipper” in Italian, a nod to its flat, elongated, somewhat irregular shape. It was created in northern Italy in the 1980s as a response to the popularity of French baguettes, and it quickly became one of the most beloved breads in the world.
What sets ciabatta apart from other breads is its high hydration dough. The batter-like consistency creates massive air bubbles inside the loaf, resulting in that open, airy crumb that’s so perfect for soaking up olive oil or layering with fresh toppings.
You’ll love ciabatta because it’s incredibly versatile. It makes exceptional sandwiches, next-level bruschetta, and the best bread for dipping into soups. It also pairs beautifully with other homemade bread recipes on recipbest.com, so if you’re building your bread-baking repertoire, this one belongs at the top of your list.
learn more about ciabatta’s unique structure
Ciabatta Bread Ingredients
One of the things that surprises most people about ciabatta is how few ingredients it actually needs. No fancy additions, just the basics, working together in the right proportions.
What You’ll Need:
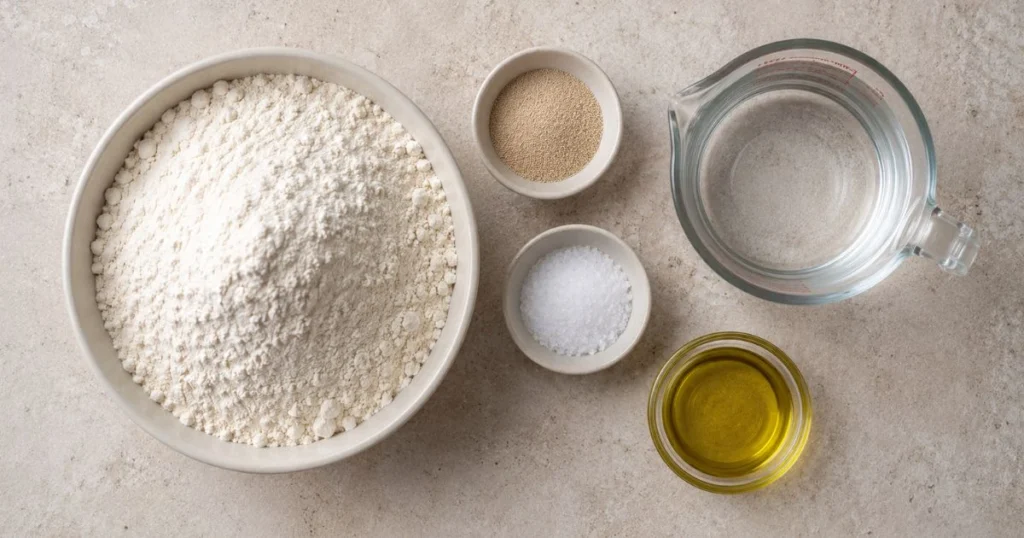
- 3 cups (360g) bread flour or all-purpose flour
- 1½ tsp instant yeast
- 1½ tsp salt
- 1¼ cups (300ml) warm water (about 110°F/43°C)
- 2 tbsp olive oil
Ingredient Tips and Substitutions:
Bread flour has a higher protein content than all-purpose flour, which means it develops more gluten and gives you that satisfying chew ciabatta is famous for. That said, all-purpose flour works just fine, your loaf will still be delicious.
Instant yeast can be added directly to the flour without proofing. If you only have active dry yeast, dissolve it in the warm water for about 5 minutes before adding your other ingredients.
The olive oil adds a subtle richness and helps the crust develop beautifully. Don’t skip it.
Here’s the most important thing to know before you start: this dough is going to look completely different from any bread dough you’ve worked with before. It will be wet, sticky, and almost pourable. That is exactly right. The high water content is the entire secret to ciabatta’s signature holes. Do not add extra flour, just trust the process.
difference between bread flour and all-purpose flour
How to Make Ciabatta Bread Step by Step
Step 1 — Mix the Dough
In a large bowl, combine your flour, yeast, and salt. Whisk them together briefly so the salt doesn’t sit directly on the yeast.
Add the warm water and olive oil. Stir everything together with a wooden spoon or mix with a stand mixer fitted with a dough hook on medium speed for about 3 minutes. The dough will look rough and shaggy at first, then gradually come together into a wet, sticky mass. That’s exactly what you want.
If you’re using a stand mixer, let it run for 3–4 minutes until the dough starts to pull away from the sides slightly. By hand, just mix until everything is combined, you don’t need to knead it traditionally.
Cover the bowl tightly with plastic wrap or a damp kitchen towel.
Step 2 — The First Rise (Bulk Fermentation)
Let your dough rise at room temperature for 1.5 to 2 hours, or until it has roughly doubled in size. During this time, the yeast is doing all the heavy lifting, developing flavor, creating gas bubbles, and building structure.
For a warmer proofing environment, try this trick: preheat your oven to the lowest setting for about 2 minutes, turn it off completely, then place your covered bowl inside with just the oven light on. That gentle warmth is perfect for fermentation.
If you want even more depth of flavor, you can do a cold overnight rise. Mix your dough the night before, cover it, and refrigerate it for 8–12 hours. The next day, bring it back to room temperature for about an hour before continuing. This slow fermentation is what professional bakers swear by for incredible taste.
Step 3 — Stretch and Fold (The Secret to Big Air Holes)
This is the step that makes all the difference, and it couldn’t be simpler.
During the first rise, every 30 minutes, you’re going to do one set of stretch and folds. Here’s how: reach into the bowl, grab one side of the dough, stretch it up as high as it’ll go without tearing, then fold it over to the opposite side. Rotate the bowl 90 degrees and repeat, four folds total.
You’ll do this 3–4 times during the bulk rise. By the final set, you’ll notice the dough feels noticeably more elastic and holds its shape better. This is gluten development without any traditional kneading, and it’s what gives ciabatta its beautiful structure while preserving all those precious air bubbles.
Don’t skip this step, it’s truly the heart of the whole process.
Step 4 — Shape Your Ciabatta Loaves
Once your dough has risen, it’s time to shape your loaves. This part requires a gentle touch.
Generously flour your work surface, and I mean generously. Carefully turn the dough out onto the floured surface, trying not to deflate it too much. Use a bench scraper or a floured spatula to help coax it out of the bowl.
Divide the dough into two equal portions. With floured hands, gently shape each portion into a rough rectangle, stretching it slightly lengthwise. You’re not trying to be precise here, the rustic, irregular shape is part of ciabatta’s charm.
Transfer each loaf to a parchment-lined baking sheet, dusting the tops with a little flour. The parchment is important; it prevents sticking and makes it easy to slide your loaves into the oven.
Step 5 — Second Rise (Proofing)
Cover your shaped loaves loosely with a clean kitchen towel or lightly greased plastic wrap. Let them rest for 45 minutes to 1 hour. They should look puffy and relaxed, but not doubled in size.
This second rise is called proofing, and it’s non-negotiable. It allows the shaped loaves to relax and develop one final round of gas bubbles before hitting the hot oven.
While your loaves are proofing, get your oven preheated, this is critical for ciabatta success.
Step 6 — Bake to Golden Perfection
Preheat your oven to 450°F (230°C). If you have a baking stone or a heavy cast-iron pan, place it on the middle rack while the oven preheats. The intense heat of that preheated surface gives the bottom of your ciabatta an incredible crust.
Steam is your other secret weapon. Place an empty metal baking pan on the oven’s bottom rack while it preheats. When you slide your ciabatta in, carefully pour about 1 cup of boiling water into that empty pan. The steam that immediately fills the oven is what creates the crispy, shattery crust ciabatta is known for.
Quick safety note: Use oven mitts and be careful, steam is extremely hot. Open the oven door away from your face when adding the water.
Bake your ciabatta for 22–25 minutes, until it’s a deep golden brown. If you have an instant-read thermometer, the internal temperature should reach 200–205°F (93–96°C). You can also tap the bottom of the loaf, if it sounds hollow, it’s done.
Transfer to a wire rack and let it cool for at least 30 minutes before slicing. I know that’s hard to do, but slicing into hot bread compresses the interior and ruins all that beautiful open crumb you worked so hard to create.
Expert Tips for the Best Ciabatta Bread
Embrace the wet dough. The biggest mistake beginners make is adding more flour because the dough feels too sticky. Resist this completely. The stickiness is the point.
Steam makes the crust. Without steam in the oven, ciabatta develops a thick, dull crust instead of that paper-thin crackle. The boiling water trick is the most accessible way to achieve it at home.
Bread flour is worth buying. If you bake bread even occasionally, keeping a bag of bread flour on hand makes a noticeable difference in texture and chew.
Overnight cold rise = more flavor. If you have the time, the refrigerator method produces a richer, more complex loaf with even better texture.
Use a kitchen scale. Bread baking is one area where precision really does matter. A digital scale makes the difference between consistent results and guesswork.
If you love a crusty, chewy European-style bread, make sure to check out our recipe for French bread at home, another beautiful loaf you can make with simple pantry ingredients.
Common Ciabatta Mistakes and How to Fix Them
Dense loaf with no holes: You likely added too much flour, didn’t do the stretch-and-folds, or under-proofed the dough. Trust the stickiness and don’t skip any rises.
Loaf spread out completely flat: The dough may have been over-proofed, or you shaped it too aggressively and deflated all the gas. Handle the shaped dough as gently as possible.
Pale, soft crust: Your oven wasn’t hot enough, or you skipped the steam. Make sure your oven is fully preheated (give it a full 30 minutes at temperature) and always add steam.
Gummy interior: The bread wasn’t baked long enough, or you sliced it too soon. Use a thermometer to check the internal temperature, and give it a full 30-minute rest after baking.
How to Serve Ciabatta Bread
Once your ciabatta is baked and cooled, the world is your oyster. Here are some of our favorite ways to enjoy it:
Classic bruschetta: Slice, toast under the broiler, rub with a raw garlic clove, drizzle with good olive oil, and top with diced fresh tomatoes, basil, and a pinch of salt. Simple, perfect.
Ciabatta sandwiches: The open crumb structure holds sandwich fillings beautifully without turning soggy. Try it with fresh mozzarella, basil, and heirloom tomatoes for a caprese sandwich, or layer it with turkey, pesto, and roasted red peppers.
Soup dipper: Ciabatta is the ultimate bread for soaking up broth. Serve it alongside our creamy chicken tortilla soup or loaded baked potato soup for a meal that feels like a warm hug.
Garlic bread: Day-old ciabatta makes outstanding homemade garlic bread, slice it, brush with garlic butter, and broil until golden. Absolutely irresistible.
How to Store and Freeze Ciabatta
Room temperature: Wrap your ciabatta in a clean cloth towel, not plastic wrap or a plastic bag. Plastic traps moisture, which softens the crust and can make the bread go stale faster. Wrapped in cloth, it stays good for about 2 days.
Refreshing day-old ciabatta: Dampen the outside of the loaf very lightly with water and pop it into a 350°F (175°C) oven for 8–10 minutes. The crust will crisp right back up, and the bread will taste freshly baked.
Freezing: Ciabatta freezes beautifully. Slice it first, then freeze slices in a zip-lock bag for up to 3 months. Pull out individual slices and toast them directly from frozen, they’ll be perfect every time.
Conclusion
Making ciabatta at home is one of the most rewarding things you can do in the kitchen. Yes, the dough is sticky and wet and totally unlike what you might expect. Yes, it requires a little patience through the rises and stretch-and-folds. But the result, that golden, rustic loaf with the crackly crust and the gorgeous holes, is absolutely worth every minute.
You’ve got all the tools and knowledge you need. Now it’s time to put them to work.
I’d love to see how your ciabatta turns out! Leave a rating below, drop a comment with your questions or results, and share a photo if you’re proud of that loaf (you should be!). Happy baking, and don’t forget to explore all our other bread recipes for your next baking adventure.