
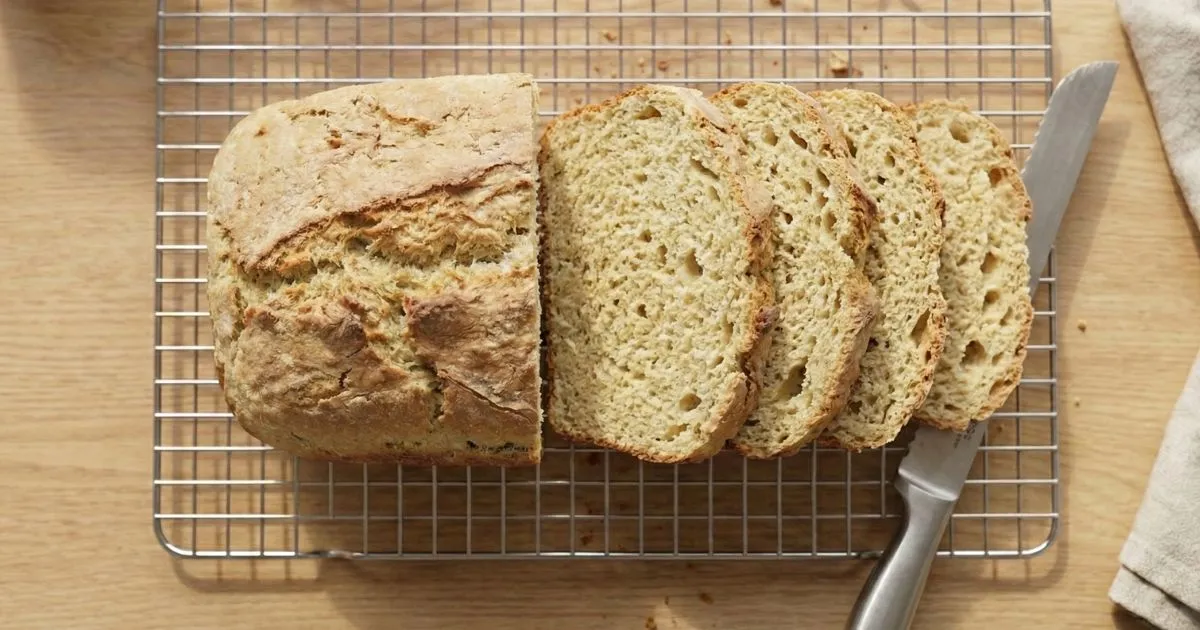
How to Make Gluten Free Bread
How to Make Gluten Free Bread: A Step-by-Step Guide to Bakery-Quality Loaves at Home
You’ve been told that making gluten free bread from scratch is complicated, unpredictable, or simply not worth the effort. That’s not true. With the right technique, precise measurements, and an understanding of how gluten free ingredients work together, you can create bakery-quality loaves in your own kitchen that rival anything you’d buy at premium prices.
This comprehensive guide takes you through every stage of the gluten free bread-making process, from selecting the perfect flour blend to achieving that coveted golden crust and tender crumb. Whether you’re navigating celiac disease, gluten sensitivity, or simply exploring alternatives to wheat-based bread, you’ll discover that homemade gluten free bread delivers superior flavor, texture, and nutritional value compared to store-bought options.
The process differs from traditional bread making, but it’s actually more forgiving in several ways. You won’t knead the dough, you won’t worry about overworking gluten, and you’ll work with a batter-like consistency that’s simpler to manage than sticky wheat dough. By the end of this article, you’ll have the knowledge and confidence to produce consistent, delicious results every single time.
Understanding Gluten Free Bread: What Makes It Different
The Science Behind Gluten Free Baking
Before you begin mixing ingredients, you need to understand what you’re replacing. In traditional bread, gluten, a protein found in wheat, barley, and rye, creates an elastic network that traps carbon dioxide bubbles produced by yeast. This network gives bread its characteristic chewy texture, structural integrity, and impressive rise.
When you remove gluten from the equation, you’re eliminating the very framework that makes bread work. This is why early gluten free breads were notorious for being dense, crumbly, and disappointingly bland. Modern gluten free baking has evolved significantly by replicating gluten’s functions through strategic ingredient combinations.
You’ll achieve this structure using binding agents like xanthan gum or psyllium husk powder, which create elasticity and prevent your bread from crumbling into pieces. According to research published by the Journal of Food Science, these hydrocolloids effectively mimic gluten’s viscoelastic properties by forming gel-like networks that trap gas and provide structure. Protein-rich flour combinations, incorporating almond flour, sorghum, or brown rice flour, add the structural backbone that wheat naturally provides. You’ll also work with higher moisture content than traditional bread recipes because gluten free flours absorb liquid differently and require extra hydration to prevent that characteristic dry, gritty texture. The USDA’s FoodData Central provides detailed nutritional comparisons between wheat and gluten free flours, helping you understand these absorption differences.
Key Differences from Traditional Bread Making
Your approach to gluten free bread fundamentally differs from conventional methods. You won’t knead the dough, in fact, overworking gluten free batter can actually damage the delicate structure you’re building with binding agents. Your rise times will be shorter to prevent collapse, since the binding network isn’t as robust as gluten’s protein chains.
You’ll work with a batter-like consistency rather than the familiar smooth, elastic dough of wheat bread. This might feel unusual at first, but it’s completely normal. Temperature control becomes critical for proper activation of your binders and yeast, so you’ll pay closer attention to your kitchen environment and ingredient temperatures than you might with traditional recipes.
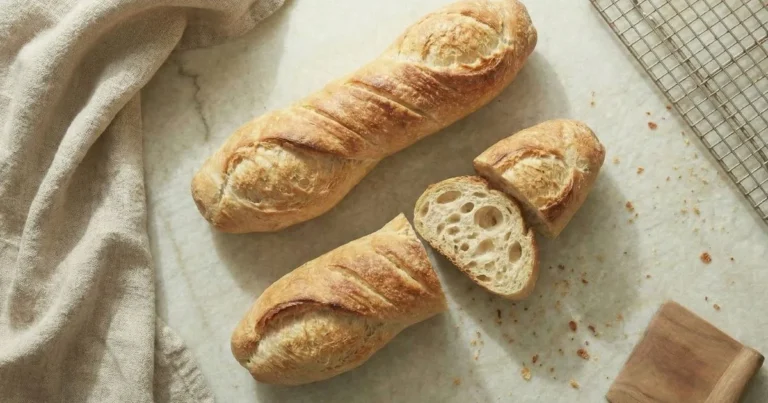
Understanding these differences transforms your expectations and helps you recognize what success looks like at each stage. Similar to how you’d approach specialty recipes like how to make French bread, gluten free bread requires specific techniques that, once mastered, become second nature.
Essential Ingredients for Homemade Gluten Free Bread
The Best Gluten Free Flour Blend
Your flour blend is the foundation of successful gluten free bread. Single-flour recipes consistently produce inferior results, either too gummy, too crumbly, or with off-putting flavors. You need a carefully balanced combination that mimics wheat flour’s protein and starch ratio.
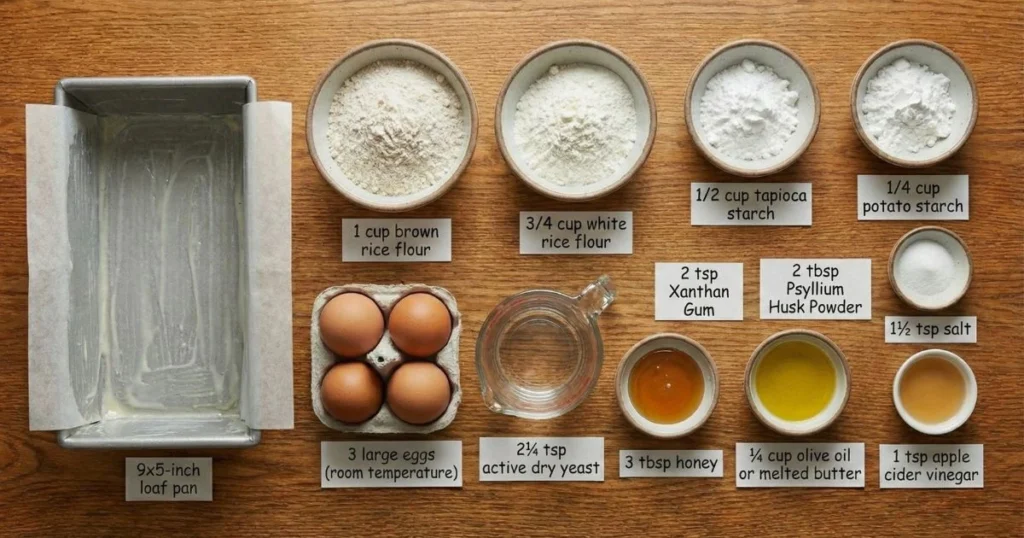
Primary Flour Base (2½ cups total):
- 1 cup brown rice flour (provides structure and mild, slightly nutty flavor)
- ¾ cup white rice flour (lightens the overall texture)
- ½ cup tapioca starch (adds the chewy quality you associate with good bread)
- ¼ cup potato starch, which helps create a softer texture and improves moisture retention
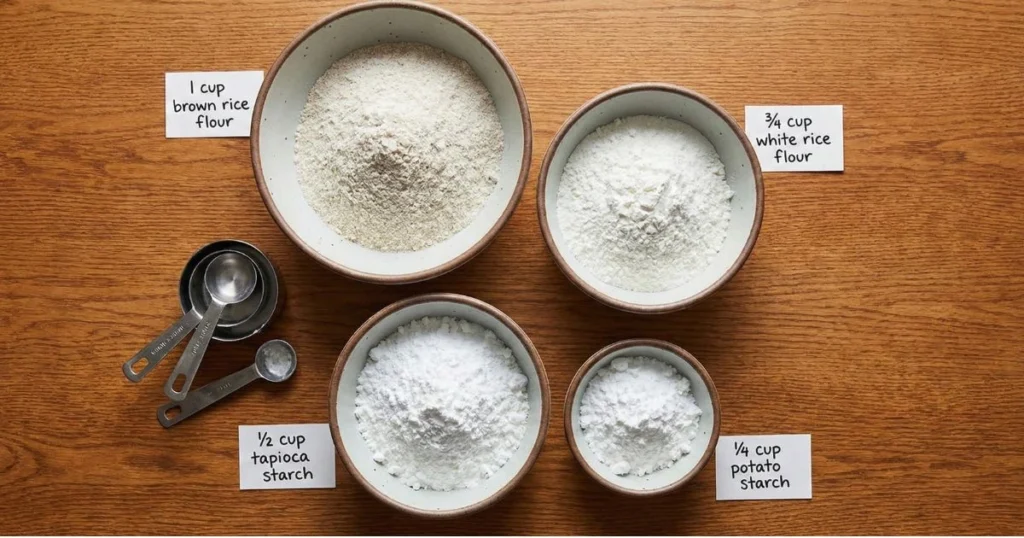
This specific ratio matters enormously. Brown rice flour delivers protein and structure but can be dense on its own. White rice flour balances this with a lighter crumb. Tapioca starch creates elasticity and that satisfying chew, while potato starch keeps your bread tender and prevents premature staling.
You’ll find pre-made commercial blends at your grocery store, and some work reasonably well. However, custom blending gives you superior control over texture and allows you to adjust ratios based on your preferences. According to the Gluten Intolerance Group, combination flours produce not only better texture but also improved nutritional profiles compared to single-flour approaches.
Binding and Structure Agents
Your binding agent is non-negotiable. Without it, your bread will crumble apart the moment you try to slice it. You have two primary options, each with distinct characteristics:
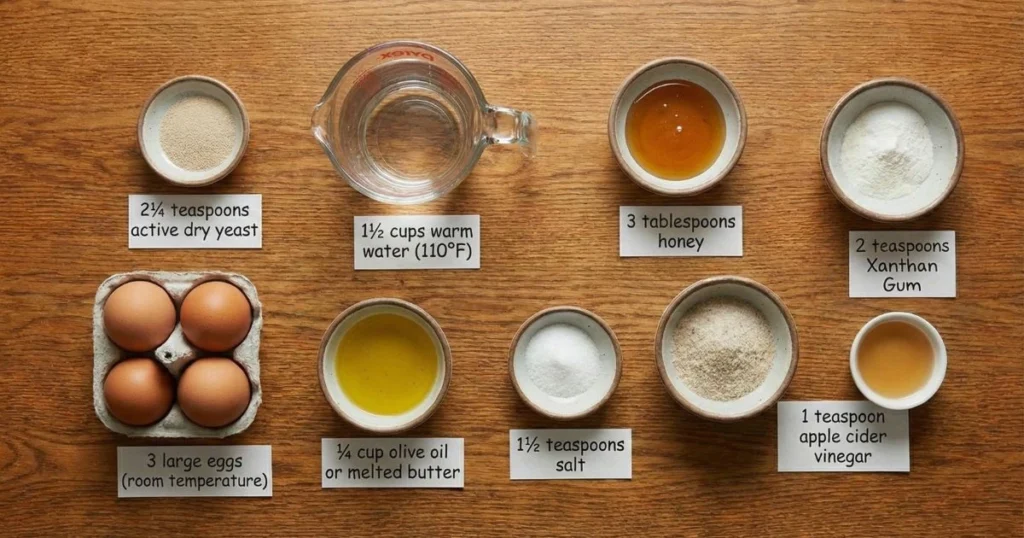
Xanthan Gum (2 teaspoons): This widely available option delivers reliable, predictable results. It creates the elastic quality that mimics gluten and works seamlessly with most flour blends. You’ll find it in the baking aisle of most supermarkets.
Psyllium Husk Powder (2 tablespoons): This alternative creates a slightly chewier texture with higher fiber content. It’s particularly effective if you prefer a more substantial, artisan-style crumb. Note that psyllium can add a faint purple tint to your bread, which disappears during baking.
Choose one binding agent, never both. Combining them creates an unpleasantly gummy texture that you can’t fix after baking. If you’re new to gluten free baking, start with xanthan gum for its straightforward performance and neutral impact on flavor and color.
Additional Core Ingredients
2¼ teaspoons (1 packet) active dry yeast: This creates the rise and develops the complex flavors you associate with quality bread. Instant yeast works equally well and doesn’t require separate activation, though this recipe uses the traditional activation method for reliability.
1½ cups warm water (110°F/43°C): Temperature precision matters here. Too hot and you’ll kill your yeast. Too cold and activation will be sluggish or fail entirely. Invest in an instant-read thermometer, it’s the single most valuable tool for consistent results.
3 tablespoons honey or sugar: This adds more than sweetness, it also plays an important functional role. Yeast feeds on sugar, and this amount provides the fuel for proper fermentation and rise. Honey adds subtle complexity, while granulated sugar creates a more neutral flavor profile.
3 large eggs (room temperature): These provide structure, moisture, and richness that partially compensate for the absent gluten proteins. Room temperature eggs incorporate more smoothly and create better emulsification with your fats.
¼ cup olive oil or melted butter: Fat keeps your crumb tender and significantly extends your bread’s freshness. Olive oil creates a slightly more tender texture, while butter adds flavor depth. Choose based on your preference, both work excellently.
1½ teaspoons salt: This enhances all the other flavors and regulates yeast activity to prevent over-fermentation. Don’t reduce or eliminate it; unsalted gluten free bread tastes flat and one-dimensional.
1 teaspoon apple cider vinegar: This seems like an odd addition, but it’s crucial. The acid strengthens the protein bonds in your eggs, creating a better crumb structure. Think of how cream of tartar stabilizes meringue, vinegar serves a similar function here.
Equipment You’ll Need for Perfect Gluten Free Bread
Essential Baking Tools
You don’t need specialized equipment, but a few key items ensure consistent success:
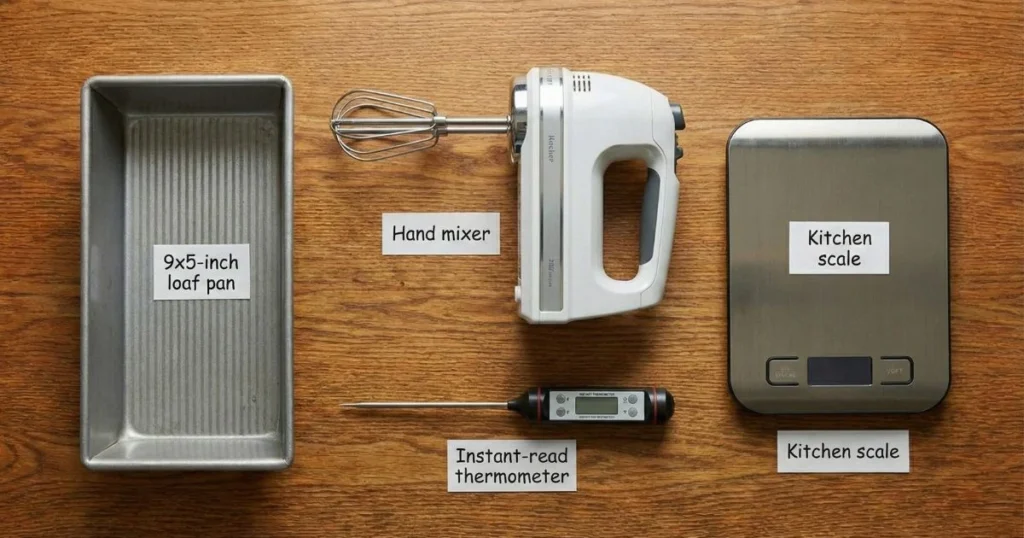
9×5-inch loaf pan: This standard size ensures proper heat distribution and produces the familiar sandwich-loaf shape. Darker pans conduct heat more efficiently and may require reducing your oven temperature by 25°F to prevent over-browning.
Stand mixer or hand mixer: Your batter is too wet to knead by hand and requires thorough mixing that’s difficult to achieve manually. A stand mixer is ideal for the 3-4 minute mixing time, but a hand mixer works if you have patience.
Instant-read thermometer: This confirms when your bread is truly done. Visual cues can be misleading with gluten free bread, but an internal temperature of 205-210°F guarantees proper doneness without guesswork.
Kitchen scale (optional but strongly recommended): Gluten free baking demands more precision than wheat-based recipes. A cup of rice flour can vary by 30-40 grams depending on how it’s settled in the bag. Weighing eliminates this variable entirely.
Helpful But Not Required
Parchment paper makes removal from the pan foolproof and simplifies cleanup. A bench scraper helps spread your thick batter smoothly in the pan. If you bake frequently, a proofing box or an oven with a proof setting maintains ideal rising temperatures, though a simple warm spot in your kitchen works perfectly well.
How to Make Gluten Free Bread: Complete Step-by-Step Instructions
Step 1—Prepare Your Workspace and Ingredients (5 minutes)
Start by bringing your eggs to room temperature. Cold eggs straight from the refrigerator won’t incorporate smoothly and can create temperature inconsistencies that slow yeast activation. If you’ve forgotten to set them out in advance, place them in a bowl of warm (not hot) water for five minutes.
Grease your 9×5-inch loaf pan thoroughly with butter or oil, paying special attention to the corners where batter tends to stick. Line the bottom with parchment paper for insurance, you’ve put significant effort into this bread, and you don’t want it tearing apart during removal.
Measure all your ingredients precisely before you begin mixing. Gluten free baking is less forgiving of approximations than traditional recipes, and having everything ready prevents rushed measurements mid-process.
Don’t preheat your oven yet. You’ll do this only after your dough has completed rising, which prevents wasting energy and maintains your kitchen’s warmth for optimal fermentation.
Step 2—Activate the Yeast (10 minutes)
In your mixer bowl, combine the warm water and honey. The temperature must be between 105-115°F, use your thermometer to verify. Water that’s too hot kills yeast instantly, while cooler water leaves yeast dormant.
Sprinkle your yeast over the surface of the sweetened water. Don’t stir it in yet. Let it stand undisturbed for 5-10 minutes until you see a creamy foam layer developing on top. This foam confirms that your yeast is alive and active.
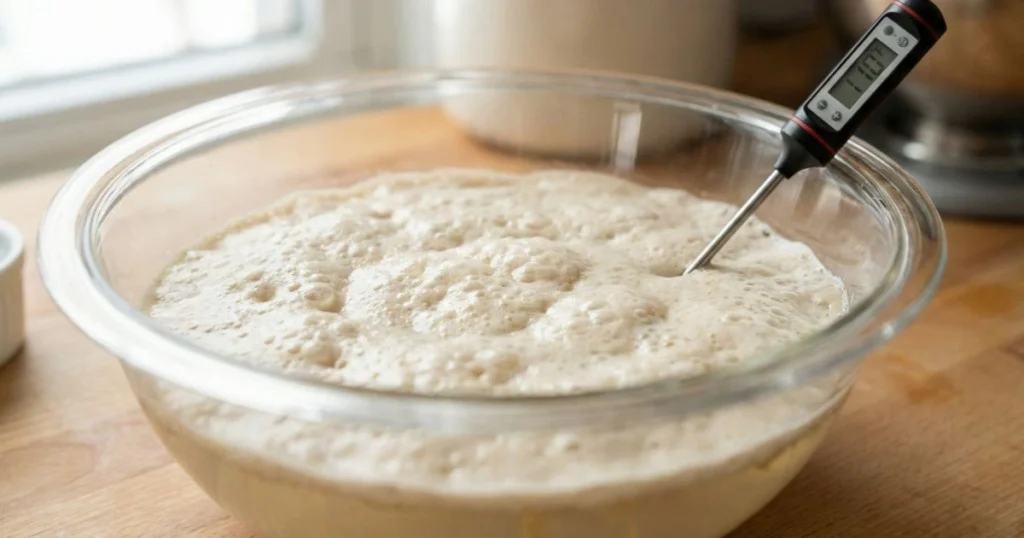
If foam doesn’t appear after 10 minutes, your yeast is dead. This happens when yeast has expired, been stored improperly, or been exposed to water that was too hot. Don’t proceed, discard this mixture and start over with fresh yeast and correctly tempered water. Attempting to continue with inactive yeast wastes all your other ingredients and guarantees failure.
Step 3—Mix the Wet Ingredients (3 minutes)
Once your yeast shows clear signs of activity, add your eggs, oil (or melted butter), and apple cider vinegar to the bowl. Mix on low speed for about 30 seconds until everything is combined.
You’re not trying to incorporate air at this stage, you’re simply creating a uniform wet mixture. The eggs should break down and distribute evenly through the liquid. You’ll notice the vinegar’s sharp smell briefly, which dissipates completely during baking.
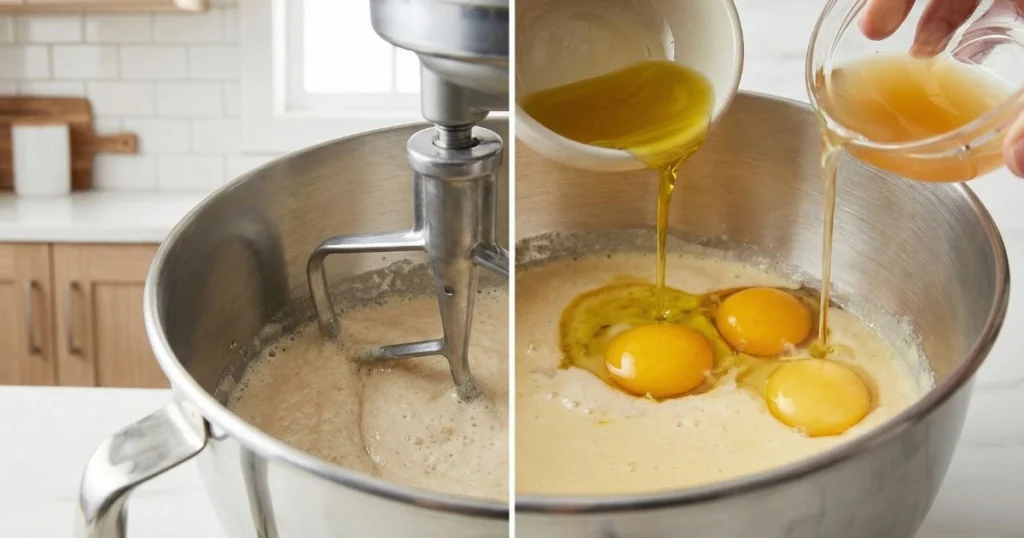
This vinegar isn’t optional. It strengthens the protein structure in your eggs, which becomes part of your bread’s framework. Without it, you’ll notice a slightly weaker crumb that’s more prone to tearing.
Step 4—Combine Dry Ingredients (2 minutes)
In a separate medium bowl, whisk together all your flour components: brown rice flour, white rice flour, tapioca starch, and potato starch. Add your xanthan gum or psyllium husk powder and salt.
Whisk vigorously for at least 30 seconds. This step is critical, xanthan gum in particular tends to clump, and those clumps create gummy pockets in your finished bread that ruin the texture. Thorough whisking distributes the binder evenly throughout your flour blend.
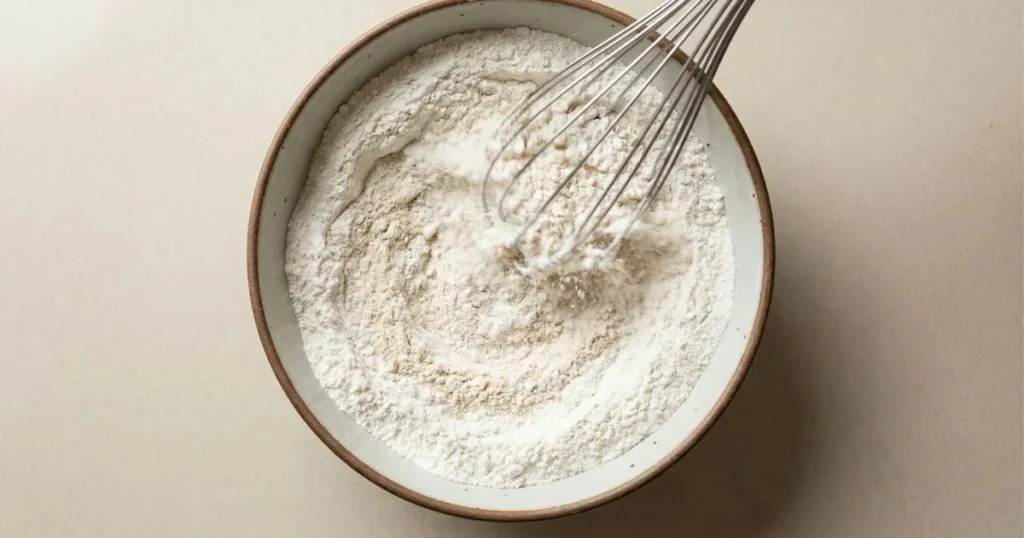
Keep your salt separate from your yeast mixture until this point. Salt inhibits yeast activity, so you never want it in direct contact with yeast during the activation phase.
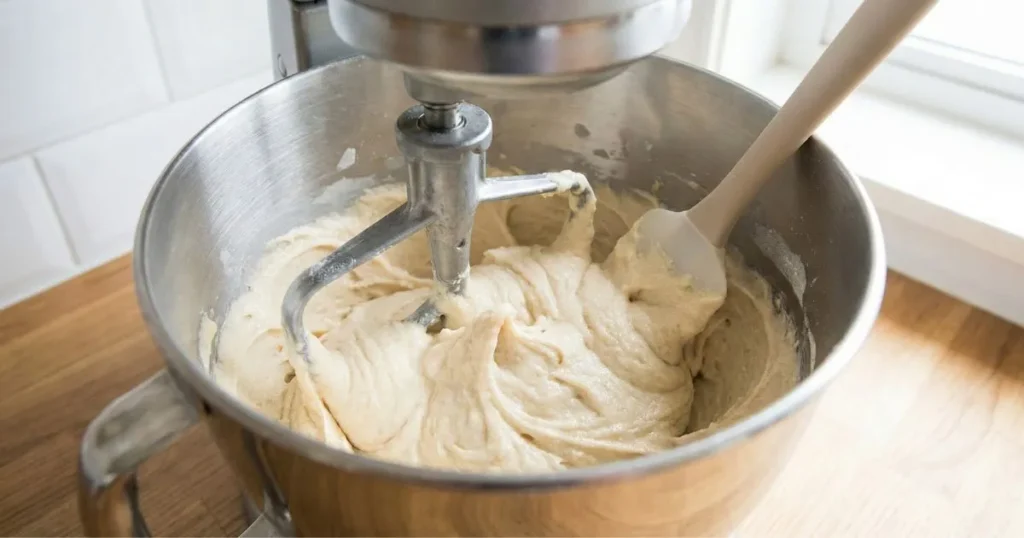
Step 5—Mix the Dough (4 minutes)
Add your dry ingredients to the wet mixture in your stand mixer. Begin mixing on low speed to prevent flour from flying out of the bowl, then increase to medium speed.
Beat for 3-4 full minutes. This is longer than you might expect, but gluten free batters need thorough mixing to fully activate the binding agents and create uniform texture. Set a timer, estimating leads to under-mixing.
Stop the mixer at least once during this process to scrape down the bowl sides with a spatula. Flour can hide in the bottom corners and create dry pockets in your bread.
Your final consistency should resemble thick cake batter. It will be much wetter than traditional bread dough, this is correct. The batter should slowly drop from a spoon but hold soft peaks when you pull the spoon away. It’s thicker than pancake batter but definitely thinner than cookie dough.
If your mixture seems too thick to spread smoothly, add water one tablespoon at a time. If it’s so thin it immediately levels itself, incorporate additional brown rice flour one tablespoon at a time.
Step 6—First Rise (45-60 minutes)
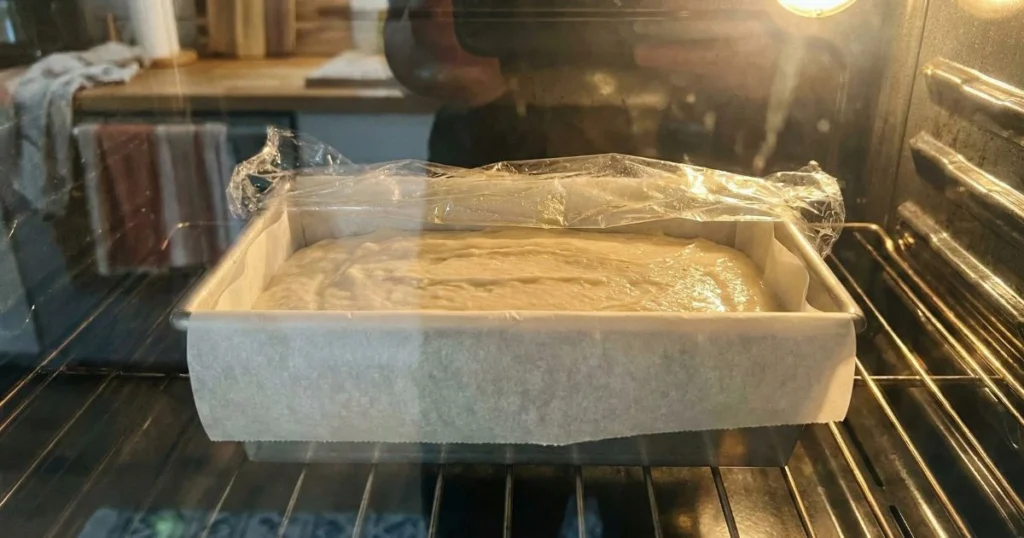
Scrape your batter into the prepared loaf pan using a spatula. The thick consistency won’t pour, so you’ll need to push it out of the bowl and spread it relatively evenly in the pan.
Smooth the top with a wet spatula or your dampened fingers. This serves two purposes: it creates a more attractive finished loaf, and the moisture prevents a skin from forming that could restrict rise.
Cover the pan loosely with plastic wrap that you’ve oiled on the underside, or use a damp tea towel. The goal is to retain moisture and warmth while still letting a bit of air circulate.
Place your pan in a warm, draft-free location. The ideal temperature range is 75-80°F. Your oven with just the light turned on (not the heat) works perfectly. Near a warm stovetop, on top of your refrigerator, or in a naturally warm room all work well.
Let your batter rise until it reaches approximately one inch below the rim of your pan. This typically takes 45-60 minutes, though it can extend to 75-90 minutes in cooler environments.
Don’t rush this step by placing the pan in a too-hot location. Excessive heat begins cooking the eggs and can kill the yeast. Patience here makes the difference between dense, heavy bread and a light, properly risen loaf.
Check your rise at the 40-minute mark, then every 5-10 minutes after. You want the batter to have visibly expanded but not to crest over the pan rim. Over-risen gluten free dough lacks the strength to hold its structure and will collapse during baking.
Step 7—Bake to Perfection (40-50 minutes)
When your dough has nearly completed rising, preheat your oven to 375°F (190°C). This timing ensures you’re not wasting energy but that the oven is fully heated when needed.
If you want a more attractive loaf with a golden, glossy finish, brush the top lightly with melted butter or a beaten egg just before baking. This is purely aesthetic but creates a professional appearance.
Place your loaf pan on the center rack of your preheated oven. Bake for 40-45 minutes, watching for these indicators of doneness:
- The top has turned deep golden brown
- The internal temperature reads 205-210°F on your instant-read thermometer (insert it into the center)
- The loaf sounds hollow when you tap the bottom (you can carefully tip it out to test this)
If your top is browning too quickly, turning dark brown before the center reaches temperature, loosely tent the top with aluminum foil after about 30 minutes of baking. This slows surface browning while allowing the interior to finish cooking.
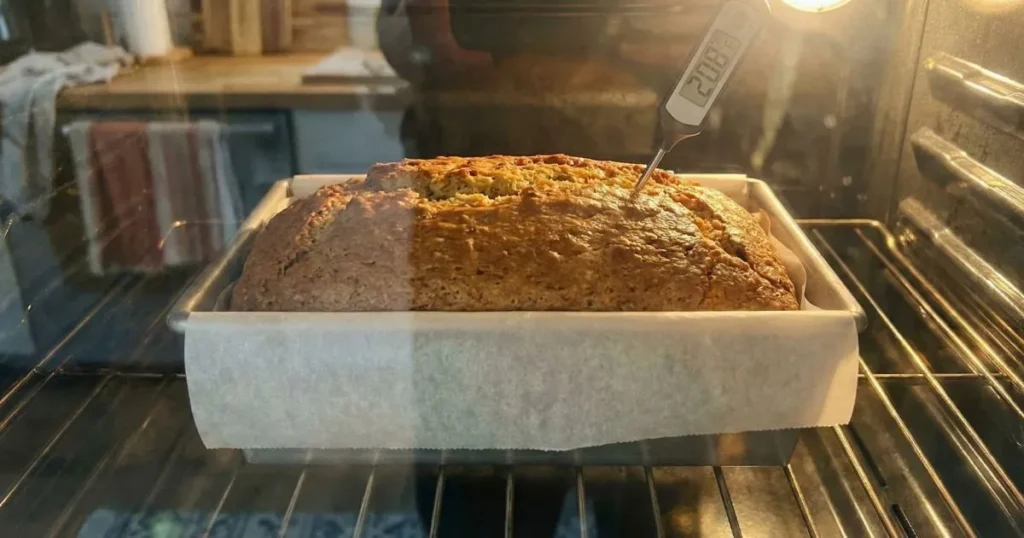
Temperature is your most reliable indicator. Under 200°F leaves you with a gummy, underbaked center that never fully sets. Over 215°F creates excessive dryness. Your instant-read thermometer eliminates all guesswork and ensures perfect results.
Step 8—Cool Properly (Essential for Texture)
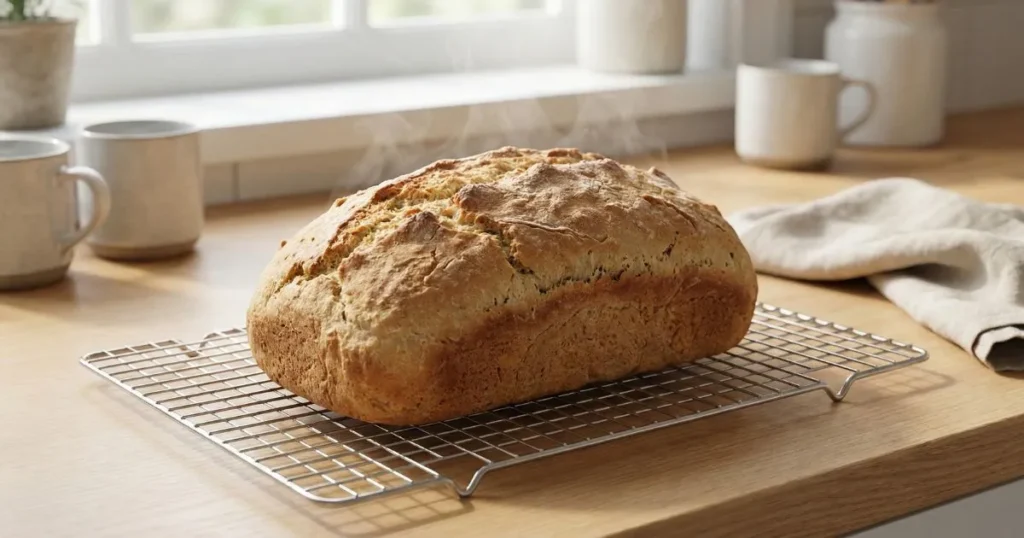
When your bread reaches proper internal temperature, remove it from the oven and let it rest in the pan for exactly 10 minutes. This brief rest allows the structure to stabilize slightly without trapping steam that would create sogginess.
After 10 minutes, turn your loaf out onto a wire cooling rack. You should be able to tip the pan and have the bread release easily thanks to your greasing and parchment paper. If it starts to stick, gently run a butter knife along the edges.
Here’s where your patience is tested: you must let your bread cool completely before slicing. This means at least one full hour, preferably closer to 90 minutes.
This isn’t a suggestion, it’s critical to your bread’s texture. Gluten free bread continues setting its internal structure as it cools. The starches crystallize, the moisture redistributes, and the crumb firms up to sliceable consistency. Cut too early and you’ll compress the bread into a gummy, dense mess that never recovers.
According to King Arthur Baking, patience during cooling is the single most common mistake in gluten free baking. The bread might look and smell ready, but it’s not. Resist temptation.
Expert Tips for the Best Gluten Free Bread Every Time
Achieving Professional Texture
Measure your flours by weight rather than volume whenever possible. Flour settles during storage and shipping, and how you scoop it dramatically affects how much ends up in your measuring cup. One cup of brown rice flour might be 130 grams or 160 grams depending on settling and scooping method. This 30-gram variance significantly impacts your bread’s texture.
Don’t allow your dough to over-rise. Gluten free batters have substantially less structural strength than wheat dough. If you let them rise above the one-inch-below-rim guideline, they’ll collapse during baking no matter how carefully you handle them. Set a timer and keep a close eye on it during the final 15 minutes of rising.
Create steam in your oven for better crust development. Place a shallow metal pan on your oven’s bottom rack and carefully pour one cup of hot water into it immediately after putting your bread in to bake. The steam keeps the surface from setting too quickly, allowing better oven spring and creating a more appealing crust. Remove the water pan after 15 minutes.
Common Mistakes to Avoid
Never rely on only one type of flour. Single-flour gluten free breads consistently disappoint with one-dimensional texture and often off-putting flavors. Sorghum-only bread is gritty, rice-only bread is chalky, and tapioca-only bread is unpleasantly gummy. The blend matters.
Don’t skip or reduce your binding agent. Beginning bakers sometimes question whether xanthan gum or psyllium is truly necessary, especially when they see the ingredient’s cost. It’s absolutely essential. Without it, your bread crumbles into pieces. With too little, you’ll have a barely-sliceable loaf that falls apart during toasting.
Always use room-temperature ingredients unless specifically instructed otherwise. Cold eggs slow yeast activity and create temperature inconsistencies throughout your batter. Cold oil or butter doesn’t emulsify properly with your eggs. Give ingredients at least 30 minutes at room temperature before beginning.
Resist opening your oven door during the first 30 minutes of baking. Each time you open the door, you drop the temperature by 25-50°F depending on how long it stays open. This temperature fluctuation interferes with rise and can cause your loaf to collapse.
Storage and Freshness
Your bread storage method dramatically affects texture and longevity. At room temperature, slice your completely cooled bread and store it in an airtight container or resealable plastic bag for 2-3 days. Keep it stored in a cool spot, away from direct sunlight and sources of heat.
Refrigeration extends life to 5-7 days but accelerates staling through a process called retrogradation, where starches crystallize more quickly in cool temperatures. Refrigerated gluten free bread tastes best when toasted, which reverses some of this staling.
Freezing is your best option for maintaining freshness beyond three days. Once your bread has cooled completely, slice it, separate the slices with small pieces of parchment paper (this prevents them from freezing together), and store in freezer bags with as much air pressed out as possible. Frozen gluten free bread keeps for up to three months.
Toast slices directly from frozen, no thawing needed. This actually produces better texture than toasting fresh bread in many cases, as the freezing and reheating process redistributes moisture in appealing ways.
Delicious Variations on Classic Gluten Free Bread
Gluten Free Sandwich Bread
For a less sweet flavor profile ideal for sandwiches, reduce your honey to 2 tablespoons and consider replacing the olive oil with melted butter. The slightly savory character works better with deli meats, cheeses, and sandwich vegetables.
You might also add 1 tablespoon of nutritional yeast to your dry ingredients for subtle umami depth that complements savory fillings without overwhelming them.
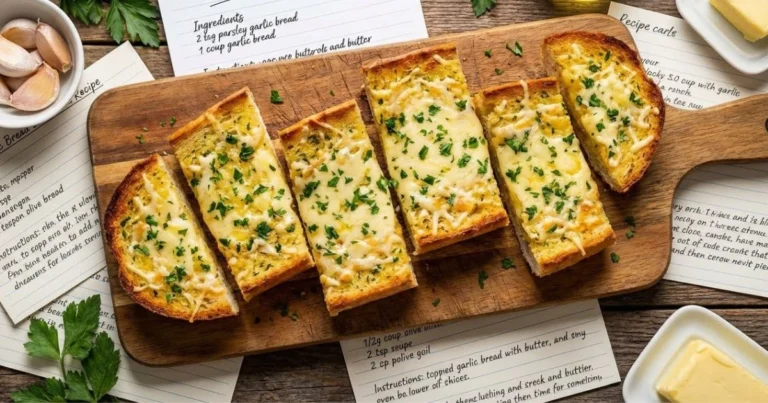
Herb and Garlic Bread
Transform your basic loaf into aromatic herb bread by adding these ingredients to your dry mixture:
- 2 tablespoons dried Italian herbs (or 3 tablespoons fresh herbs, minced)
- 1 tablespoon garlic powder (or 3 cloves fresh garlic, minced)
- 2 tablespoons nutritional yeast for additional savory complexity
This variation pairs beautifully with soups and stews. Speaking of which, this bread makes an excellent accompaniment to hearty recipes like Crockpot Potato Soup Hashbrowns or Chicken Enchilada Soup Recipe.
Seeded Whole Grain Version
Incorporate these seeds directly into your batter just before transferring it to your loaf pan:
- ¼ cup sunflower seeds
- ¼ cup pumpkin seeds (pepitas)
- 2 tablespoons flaxseeds or chia seeds
The seeds add textural interest, boost nutrition, and create visual appeal. They’ll toast slightly during baking, developing nutty flavors that complement the mild rice flour base. You can press additional seeds into the top of your loaf before baking for enhanced appearance.
Dairy-Free Adaptation
You can easily make this recipe completely dairy-free with minimal adjustments. Replace butter with coconut oil, additional olive oil, or your preferred plant-based butter alternative. Ensure you’re using a plant-based option for greasing your pan as well.
The results are virtually identical to the dairy-containing version in both texture and rise. The only noticeable difference is a slightly different flavor profile depending on which oil you choose, coconut oil adds subtle tropical notes, while olive oil leans more savory.
Lower Sugar Option
If you’re monitoring sugar intake, you can reduce the honey to 2 tablespoons maple syrup or use just 1 tablespoon of granulated sugar. This is the minimum amount needed for adequate yeast activation and feeding.
Your bread will be noticeably less sweet, the crust will be paler, and rising may take 10-15 minutes longer, but the bread will still work. You cannot eliminate the sweetener entirely, yeast requires sugar to produce the carbon dioxide that makes your bread rise.
Troubleshooting Your Gluten Free Bread
Dense, Heavy Loaf
If your bread comes out of the oven with disappointing density and poor rise, several factors might be responsible. Insufficient rise time is most common—gluten free batter needs the full 45-60 minutes in warm conditions. Check your yeast expiration date; expired yeast produces sluggish or nonexistent rise.
Verify your water temperature with a thermometer next time. If it’s too hot, the yeast dies; if it’s too cold, the yeast stays inactive. Your mixing time matters as well, the full 3-4 minutes is necessary to properly activate binding agents. Set a timer rather than estimating.
Your kitchen environment affects rise significantly. If your rising location is below 70°F, your bread will struggle. Find a warmer spot or create one by turning on your oven light.
Crumbly, Falls Apart When Sliced
Bread that crumbles uncontrollably points to three possible issues. First, verify you included your binding agent and measured it accurately. Even 1 teaspoon instead of 2 teaspoons of xanthan gum creates noticeably fragile texture.
Second, confirm you’re waiting until bread is completely cool before slicing. Warm gluten free bread hasn’t finished setting its structure and will compress and crumble under knife pressure.
Third, your flour blend might be too dry overall. Try adding 2-3 tablespoons additional water in your next attempt. Different brands of rice flour absorb moisture at different rates, so you may need to adjust slightly from the base recipe.
Gummy Center
A gummy, underbaked center that never quite sets properly has straightforward causes. Most often, you’ve removed your bread before it reached proper internal temperature. Always verify 205-210°F with your thermometer, visual cues alone can be misleading.
Too much liquid in your batter can also create persistent gumminess. Reduce water by 2 tablespoons in your next batch if the gummy texture appeared even after proper baking temperature.
Excessive binding agent creates gummy texture as well. Double-check that you measured 2 teaspoons of xanthan gum, not 2 tablespoons. This mistake is common and creates unpleasantly gummy results that you cannot fix after baking.
Flat, Didn’t Rise
Complete failure to rise indicates dead yeast in most cases. Always proof your yeast separately before proceeding, that foam layer is your confirmation of viability. Check expiration dates and storage conditions (yeast should be refrigerated after opening).
Adding salt directly to yeast during activation inhibits its function. Salt should always be mixed with dry ingredients, never with the yeast-water mixture.
Your rising environment might be too hot. Above 90°F, you begin killing yeast and cooking eggs. Stick to the 75-80°F guideline for reliable results.
Insufficient sugar can slow or prevent rise, though with 3 tablespoons of honey you should have adequate yeast food. Make sure you actually added the sweetener, it’s easy to overlook ingredients when working from memory.
Nutritional Information and Dietary Considerations
Per Slice Nutrition (Based on 12 Slices Per Loaf)
Understanding what you’re consuming helps you make informed dietary decisions:
- Calories: 165
- Protein: 4g
- Total Carbohydrates: 28g
- Dietary Fiber: 2g
- Total Fat: 4.5g
- Sodium: 295mg
These values change based on your specific ingredient choices. Using butter instead of olive oil increases saturated fat. Adding seeds boosts fiber, protein, and healthy fats. Reducing sugar slightly decreases carbohydrates.
Allergen Information
This recipe is naturally:
- ✓ Gluten-free (obviously)
- ✓ Wheat-free
- ✓ Nut-free when using the standard flour blend (avoid if you substitute almond flour)
The recipe contains eggs and may contain dairy depending on whether you use butter or oil. It is not suitable for egg-allergic individuals without modifications.
Making It Vegan
You can adapt this recipe for vegan diets by replacing eggs with plant-based alternatives. Your best options include:
Flax eggs: Stir together 3 tablespoons of ground flaxseed with 9 tablespoons of water. Let this mixture sit for 5 minutes until it becomes gel-like, then use exactly as you would chicken eggs.
Aquafaba: Use 3 tablespoons of chickpea liquid (the liquid from canned chickpeas) per egg, totaling 9 tablespoons for this recipe.
Both alternatives work, though flax eggs produce slightly denser texture while aquafaba creates results closer to the original. Combine your vegan egg replacement with dairy-free butter or oil, and you have a completely plant-based loaf.
Expect minor texture differences, vegan versions tend toward denser crumb, but the bread remains delicious and functional for all normal bread applications.
Conclusion
You now have everything you need to create bakery-quality gluten free bread in your own kitchen. This recipe eliminates the guesswork, unpredictability, and disappointing results that plague many gluten free baking attempts. By understanding the science behind ingredient interactions, following precise measurements, and respecting process timing, you’ll produce consistently excellent loaves.
Your first attempt might reveal small areas for adjustment based on your specific ingredients and environment. Perhaps your kitchen runs cool and requires longer rise times, or your particular rice flour blend absorbs moisture differently than expected. These minor variations are normal, by your second or third loaf, you’ll have developed the intuition to make real-time adjustments.
The satisfaction of slicing into homemade bread with perfect texture, knowing exactly what ingredients it contains, and spending a fraction of what specialty gluten free bakeries charge cannot be overstated. You control the quality, customize the flavors, and avoid the preservatives and additives that extend shelf life in commercial products but compromise taste and nutrition.
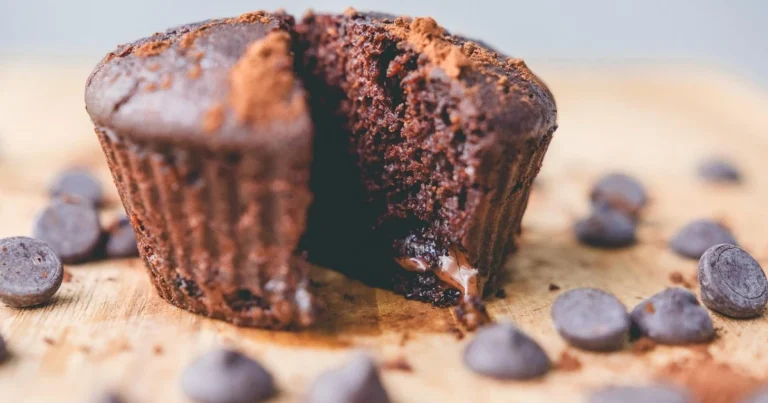
If you’ve enjoyed mastering this gluten free bread recipe, you’ll find similar satisfaction in other from-scratch projects like How to Make an Easy Banana Bread Recipe at Home, where you can apply your newfound baking confidence to naturally gluten-free quick breads.
Take Action: Start Baking Today
Don’t let this knowledge sit unused. Your ingredients are available at any well-stocked grocery store, your equipment is probably already in your kitchen, and the process takes just a few hours from start to finish, most of which is hands-off rising and baking time.
Set aside time this weekend to make your first loaf. Measure carefully, trust the process, and resist the urge to slice before cooling is complete. You’ll be rewarded with fresh bread that transforms your meals, makes incredible toast, and proves that gluten free baking doesn’t require compromise.
Once you’ve mastered this foundation recipe, explore the variations, adjust flavors to match your preferences, and enjoy the freedom of homemade bread that meets your exact dietary needs. For additional guidance on gluten free baking techniques and ingredient selection, the Celiac Disease Foundation offers comprehensive resources on safe baking practices and cross-contamination prevention. You can also find more detailed information about gluten free flour blends and their properties through King Arthur Baking’s gluten free guide, which includes extensive testing results and professional baking insights.
Your journey to confident gluten free baking starts now, grab your mixing bowl and get started.
2 Comments
Comments are closed.